MySQL is a very popular database management system that can power projects of all sizes. Its ability to handle large volumes of data without breaking a sweat is one of its biggest selling points. Connect MySQL with PHP code, you can make use of one of three methodologies.
There are three types of methods in PHP to connect the MySQL database through the backend: MySQL
- MySQLi PDO
mysql() is now obsolete due to security issues like SQL injection, etc., but the other two are being actively used.
MySQLi
MySQLi
is an API used as a connector function to link the backend of the
PHP application to the MySQL database
. It works the same as the previous version, but is safer and faster, and provides a better set of features and extensions. MySQLi was introduced with PHP 5.0.0 and drivers were installed in 5.3.0. The API was designed to support MySQL from version 4.1.13 to the latest.
The
PDO
PHP Data Objects (PDO) extension is a database abstraction layer. It’s like an interface for the backend to interact with the MySQL database and make changes without making any changes to the PHP code. It also gives you the freedom to work with multiple databases. The main advantage of using PDO is that its code remains simple and portable.
In this article, I will discuss how to connect MySQL database on different servers and also give you an overview of database connection using PDO.
Connect MySQL using Localhost Server Connect MySQL using
- Cloudways Server
- PDO Connect
- remote
- Localhost
Connect MySQL using
MySQL using
MySQL Create MySQL database on
Before you start building a PHP connection to
MySQL database
,
you need to know what PHPMyAdmin is. It is a control panel from where you can manage the database you have created. Open your browser and go to localhost/PHPMyAdmin or click “Admin” in XAMPP UI.
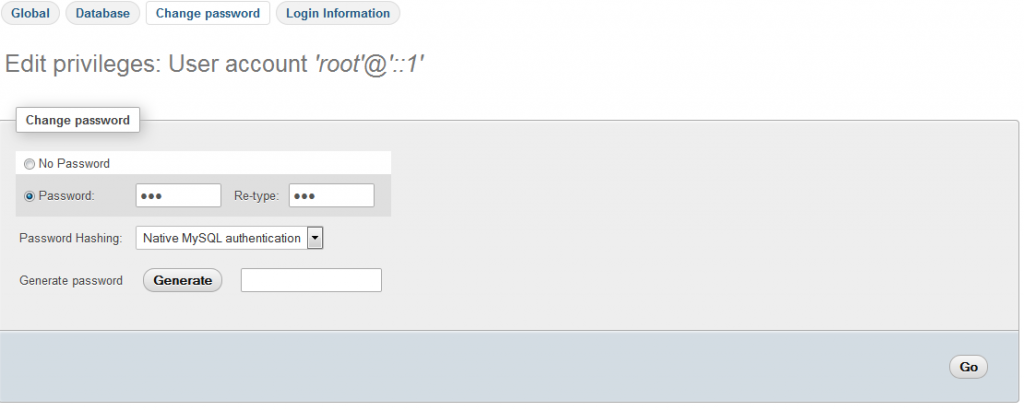
When you first installed XAMPP, you only created the username to access it, now you need to add a password to it yourself. For this, you need to go to User account where the user is the same as shown in this image:
Now click on Edit privileges and go to Change administrator password, type your password there and save it. Remember this password, as it will be used to connect to your database.
Note: You do not need to change your password to access the databases on the localhost. It’s a good practice and that’s why we’ve used a password.
Create Database
Now return to the PHPMyAdmin home page. Click the New button to create a new database.
In the new window, name your database according to your need, I’m naming it “practice“. Now select Collation as utf8_general_ci as we are using it for learning purposes and it will handle all our queries and data that will be covered in this tutorial series. Now click Create and your database will be created.
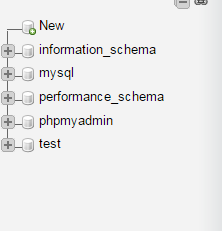
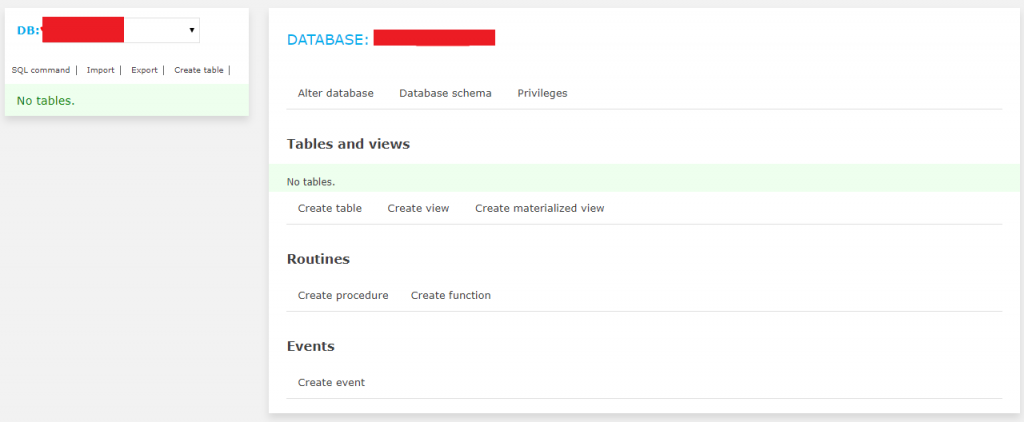
The newly created database will now be empty because there are no tables in it. I’ll cover that in the next series where we’ll learn how to create tables and insert data into them. In this tutorial, we are going to connect this database to localhost using PHP
<img src
=”https://www.cloudways.com/blog/wp-content/uploads/create-db-2.png” alt=”tables in database” /> Create a folder in htdocs Now, locate the folder where you installed XAMPP and open the
htdocs folder
(usually c:/xampp). Create a new folder inside c:/xampp/htdocs/ and name it “practice” we will place the web files in this folder. Why did we create a folder in htdocs? XAMPP uses folders in htdocs to run and run its PHP sites.
Note: If you are using WAMP, add your practice folder in the c:/wamp/www folder
. Create database connection file
in
PHP
Create a new PHP file and assign it db_connnection.php and save it. Why am I creating a separate database connection file? Because if you have created multiple files in which you want to insert data or select data from the databases, you do not need to write the code for the database connection each time.
<?php function OpenCon() { $dbhost = “localhost”; $dbuser = “root”; $dbpass = “1234”; $db = “example”; $conn = new mysqli($dbhost, $dbuser, $dbpass,$db) or die(“Connect failed: %s\n”. $conn -> error); return $conn; } function CloseCon($conn) { $conn -> close(); } ?>
Here is the explanation of the variable we have used in our db_connection file:
- $dbhost will be the host where your server runs, It is usually localhost.
- the username, i.e. root and $dbpass will be the password, which is the same one you used to access your PHPMyAdmin.
- $dbname will be the name of your database that we have created in this tutorial.
$dbuser will be
Just include it
using PHP custom function include (include ‘connection.php’) at the top of your code and call your function and use it. It also helps when you move the location of your project from one PC to another and you have to change the values in the single file and all changes will be applied to all other files automatically.
Create a new PHP file to check the database connection Create
a new PHP file
to
connect to the database. Name it index.php and add this code in this file.
<?php include ‘db_connection.php’; $conn = OpenCon(); echo “Connected successfully”; CloseCon($conn); ?>
Run it
!
Now open your browser and go to localhost/practice/index.php and you should see this screen:
Congratulations! You have successfully connected your database with your localhost! If you can’t see this screen, check if you’ve done everything right in your db_connection.php file.
Create MySQL Database on Cloudways Server
For the purpose of this tutorial, I assume you have a PHP application installed on a web server. My setup is:
PHP
- 7.3
- MySQL
I decided to host my PHP application on Cloudways managed servers because I get a highly optimized hosting stack and no server management issues. You can try Cloudways for free by signing an account and then following this simple GIF to set up the server and PHP application. Check out Cloudways’ hosting plans for AWS, Google Compute Engine, Vultr, Linode, and Digital Ocean to find the right one for you.
After successfully launching a PHP application on Cloudways, go to the application tab and check the database details and also click the button to launch the database manager.
 Connect to
the MySQL database To configure a
database
connection , use the mysql_connect function. This function returns a pointer (also known as a database identifier) to the database connection. This identifier will be used in the code later. Once you have the identifier, remember to add your database credentials.
- Create a new PHP file and name it db_connnection.php and save it.
Why am I creating a separate database connection file? Because if you have created multiple files in which you want to insert data or select data from the databases, you do not need to write the code for the database connection each time. Just include it using PHP custom function include (include ‘connection.php’) at the top of your code and call your function and use it.
At this point, you have the option to use the MySQLi procedure connection query or the PHP-based database connection PDO:
MySQLi Procedural Query
<?php $servername=”localhost”; $username = “username”; $password = “password”; $db = “dbname”; Create connection $conn = mysqli_connect($servername, $username, $password,$db); Check the connection if (!$conn) { die(“Connection error: ” . mysqli_connect_error()); } echo “Connected successfully”; ?>
Connect MySQL database with PHP using PDO <
?php $servername = “localhost”; $username = “username”; $password = “password”; $db = “dbname”; try { $conn = new PDO(“mysql:host=$servername;dbname=myDB”, $username, $password, $db); // set PDO error mode to exception $conn->setAttribute(PDO::ATTR_ERRMODE, PDO::ERRMODE_EXCEPTION); echo “Connected successfully”; } catch(PDOException $e) { echo “Connection error: ” . $e->getMessage(); } ?>
Check Connection
<?php include ‘db_connection.php’; echo “Connected successfully”; mysqli_close($conn); ?>
For PDO close the connection so
$conn = null;
remote MySQL For remote connection PHP
MySQL
Log in to Cloudways Platform with your credentials. Click “Servers” on the top menu bar. Then, click on your destination server from the list.
Next, go to the Security menu option in the left menu and then click
- on the MySQL tab. Add the IP address to the
- “Add IP to whitelist” text area and click the “Add”
- If you have multiple IP addresses, repeat the process.
- Once you are done, click the “Save Changes” button to finish the changes
button.

After successfully setting the IP whitelist, set the IP address online and run the query.
Top
MySQL MySQL Workbench Management Tools
MySQL Workbench
It is a visual tool for database designers, developers, and database administrators. MySQL Workbench offers information modeling, SQL advancement, and end-to-end orchestration appliances for server layout, client orchestration, hardening, and more. MySQL Workbench is accessible on Windows, Linux and Mac OS X.
MySQL Workbench is a very popular MySQL database manager for developers. It provides useful management tools such as server configuration, user management, and many others. It is available for MAC OS, Linux and Windows operating systems.
We advise all those budding developers who want to learn database administration to use it to their advantage. Management features will help them master database management as a whole.
Advantages
- Save SQL statements
- Provides offline access to remote databases
- Stores multiple connections in one location
- Visual schema and query builder available
- Cons It is more complex compared to PHPMyAdmin
- Users often report software glitches.
.
Navicat
For MySQL
Navicat is a graphical database administration and software development series. It could be a single application that allows you to associate with PHP MySQL connection and MariaDB databases at the same time. Consistent with cloud databases such as Amazon RDS, Amazon Aurora, Oracle Cloud, Google Cloud, and Microsoft Azure.
Navicat for MySQL provides all the advanced tools a developer needs to fully manage their database operations. Its support for cloud databases makes it useful to use when managing a cloud-based application. Some of its main features are
:
Advantages
- Intuitive and easy to use
- user interface
- It provides an easy connection to the MySQL database through the SSH terminal
- Schedule database jobs: backup, restore, report execution, and more
- Import and export data from ODBC, Excel, Access, DBF, TXT, CSV, XML, JSON.
- Visual schema and query generators available
- Compatible with Windows, Linux and MAC operating systems.
- Team collaboration feature available
.
.
.
.
Cons
The
- professional version is expensive
- Running on Linux requires Wine, which slows down the IDE.
- Time-consuming process management
MySQL
Yog
This MySQL
management tool has three packages available i.e. Professional, Enterprise and Pro. You can choose any of them after testing
.
MySQL administrators can easily work with this platform and can handle their database tasks efficiently. It is available only for Windows operating systems.
Pros
- Soft query design tool available
- It offers advanced features that help you learn database administration
.
- Cons The pro version is heavy in your pocket
- Users often report occasional software glitches
- any database except MySQL
- native support for Linux and MAC operating systems
- There is no drag and drop support between multiple tabs.
Does not support
There is no
.
MySQL
Cloudways Database Manager Cloudways’ MySQL database manager is by far one of the most useful and useful MySQL management tools for developers. It is very user-friendly due to its user-friendly user interface and provides all the required MySQL management tools that a database administrator should have:
Advantages
- It offers a user-friendly and customizable user interface with advanced features
- Visually design schema tables, constraints, and queries
- Easy connection to the MySQL database via SSH terminal.
.
.
- Cons There is no drag and drop support available for multiple tabs
- Lack of support for databases other than MariaDB, MySQL.
.
Conclusion
A good database structure is the backbone of any application. Whether it’s a CMS or an online task tracking platform, you need a MySQL database to track application and user information and server data for application processes.
In this tutorial, we’ve learned two things:
How to
- create a new database How to connect
- MySQL database with PHP
Both MySQLi and PDO have their preferences. However, before starting one should keep in mind that MySQL is only used to connect MySQL with PHP, if you need to migrate to another database, you will be able to modify all the code. On the other hand, PDO works with 12 diverse databases, which makes the migration much less demanding.