I
was recently trying to install an application using apt command on Ubuntu when I came across the following
error:E: Could not lock /var/lib/dpkg/lock
– open (11: Resource temporarily unavailable)E: Unable to lock admin directory (/var/lib/dpkg/), is another process using it?
In fact, there is a similar error you may see
:E: Could not lock /var/lib/apt/lists/lock – open (11: Resource temporarily unavailable)E: Unable to lock directory /var/lib/apt/lists/E: Could not lock /var/lib/dpkg/lock
– open (11: Resource temporarily unavailable)E: Unable to lock the administration directory (/var/lib/dpkg/), Is it being used by another process?
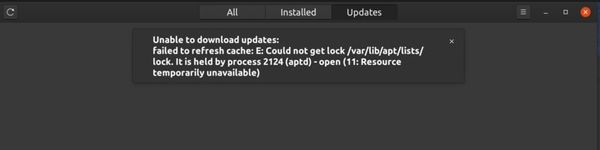
In some cases, you may see it while using
Software Center:<img src="https://itsfoss.com/content/images/wordpress/2019/12/Could_not_get_lock.jpg" alt="Could not lock
These errors are very similar to another common Ubuntu error, Unable to lock /var/cache/apt/archives/ directory, and the interesting thing is that the fixes are also similar.
Fixing “Unable to lock administration directory (/var/lib/dpkg/)”
error
you will see this error because some other program is trying to update Ubuntu. When a command or application is updating the system or installing new software, it blocks the dpkg (Debian package manager) file.
This blocking is done so that two processes do not change the content at the same time, as it can lead to an unjustified situation and a possible broken system.
Let’s see what steps you can take to fix this ‘unable to block admin directory’ issue.
Method 0:
The first thing you need to do is to check if any other program might be running a system update or installing a program
.
If you are using the command line, check if an application like Software Center, Software Updater, Synaptic package manager, Gdebi is running any update/installation. If that is the case, wait for the program to finish the execution process.
If there is no such application running, check all open terminal windows and see if you are running an update or installing a program. If so, wait for it to finish.
If none of the above is happening, check what other process is running the apt (package manager to handle software) command. Use this command:
ps aux | grep -i apt
For me, it showed this output
:[email protected]:~$ ps aux | grep -i apt root 1464 0.0 0.0 4624 772 ? Ss 19:08 0:00 /bin/sh /usr/lib/apt/apt.systemd.daily update root 1484 0.0 0.0 4624 1676 ? S 19:08 0:00 /bin/sh /usr/lib/apt/apt.systemd.daily lock_is_held update _apt 2836 0.8 0.1 96912 9432 ? S 19:09 0:03 /usr/lib/apt/methods/http abhishek 6172 0.0 0.0 21532 1152 pts/1 S+ 19:16 0:00 grep -color=auto -i apt
If you see that apt is being used by a program like apt.systemd.daily update, you’re in luck, my dear reader.
This is a daemon that runs in the background and checks for system updates automatically when you start the system.
On Ubuntu 18.04 and higher versions, you can even try to download and install the important security updates on your own. At least this is what I see in the default settings in the Software and Updates tool on the Ubuntu desktop.
 Ubuntu can install security updates in the
If you are on the Ubuntu server, you can check if you have unattended updates enabled by checking the contents of the /etc/apt/apt.conf.d/20auto-upgrades file.
So if you see that apt.systemd.daily is using the apt process, all you have to do is wait for a few minutes. When the automatic update is complete, you should be able to install the software as usual.
As a permanent solution, you can disable checking for automatic updates and unattended updates completely, however, I will not recommend it for security reasons.
Now, that was the simple scenario and could be easily handled. But that might not always be the case. If some other program is using apt, you should handle it differently.
Method 1:
Use the Linux command line to find and kill the running process. To do that, use the following command:
ps aux | grep -i apt
This will show you the ID of the process running apt or apt-get. In the following example, the process ID is 7343. You can ignore the last line containing ‘grep -color=auto’.

You can use the process id to terminate it by sending the SIGTERM signal. Replace the <process_id> with the number you got in the output of the previous command.
sudo kill <process_id>
Check if the process was executed by running the command ‘ps aux | grep -i apt’. If it is still running, force kill it with SIGKILL signal:
sudo kill -9 <process_id>
Another easier way would be to use the killall command. This will kill all instances of a running program:
sudo killall apt apt-get
Method 2
The above method would fix the problem in most cases. But my case was a little different. I was updating my system and accidentally closed the terminal. For that reason, there were no processes running apt, but it still showed me the error.
In this case, the root cause is the crash file. As mentioned earlier, lock files are used to prevent two or more processes from using the same data. When apt or apt-get commands are executed, they create lock files in some places. If the previous apt command was not completed successfully, the lock files are not deleted and therefore prevent new instances of apt-get or apt commands.
To fix the problem, all you need to do is delete the crash files. But before doing that, it would be a good idea to stop any process that is using the lock files.
Use the lsof command to get the process ID of the process that contains the lock files. Check the error and see which crash files you are complaining about and get the identification of the processes containing these crash files.
Run these commands one by one.
sudo lsof /var/lib/dpkg/lock sudo lsof /var/lib/apt/lists/lock sudo lsof /var/cache/apt/archives/lock
Commands may return nothing or return only a number. If they return at least one number, use the number(s) and delete processes like this (replace the <process_id> with the numbers you got from the commands above)
:sudo kill -9 <process_id>
You can now safely delete lock files using the following commands:
sudo rm /var/lib/apt/lists/lock sudo rm/var/cache/apt/archives/lock sudo rm/var/lib/dpkg/lock
After that, reconfigure the packages:
sudo dpkg -configure -a
Now, if you run the sudo apt update command, everything should be fine.
Troubleshooting 1: “Unable to acquire dpkg frontend lock”
If you see an error like this
:[email protected]:~$ sudo apt install grub-customizer E: Could not get /var/lib/dpkg/lock-frontend lock – open E
: Unable to acquire
dpkg frontend lock (/var/lib/dpkg/lock-frontend), is it being used by another process?
You need to find out what process is holding the lock-frontend using the lsof command as discussed in the previous sections
:sudo lsof /var/lib/dpkg/lock-frontend
Here’s what he showed for me
:[email protected]:~$ sudo lsof /var/lib/dpkg/lock-frontend lsof: WARNING: can’t stat() fuse.gvfsd-fuse file system /run/user/1000/gvfs The output information may be incomplete. PID COMMAND USER FD TYPE DEVICE SIZE/OFF UNATTENDED NODE NAME 2823 root 5uW REG 8.2 0 145221 /var/lib/dpkg/lock-frontend
If you see the COMMAND column ‘unattende‘, it means that unattended security updates are running. You need to wait for the process to finish. Basically, this is what I discussed in method 0, but you probably skipped it.
If the COMMAND is something else, you can kill the process and then delete the lock file. You can see the process ID in the PID column. Use this PID to kill the process. After that, delete the crash file and run the update command to see if it has been fixed.
sudo kill -9 PID sudo rm /var/lib/dpkg/lock-frontend sudo apt updateWhat is that lsof: warning cannot stat() fuse.gvfsd-fuse file system?
Note: If you see the lines “lsof: warning can’t stat() fuse.gvfsd-fuse file system /run/user/1000/gvfsOutput information may be incomplete” after running the lsof command mentioned above, do not panic
.
That’s not a mistake. It’s just that lsof also tries to search mounted file systems and the warning is about those mounted systems.
Files are locked by processes on your main file system, so if you show any warnings and there is no output, this only means that there is no process using those lock files.
Troubleshooting 2: “dpkg: error: dpkg frontend is blocked by another process”If you see the error “dpkg frontend
is blocked by another process” when you run the steps in method 2, you need an additional step
.
First, find out the identification of the process that contains the lock file.
sudo lsof /var/lib/dpkg/lock-frontend
The above command will give you the details of the processes that use the lock files. Use process ID to kill this program
:sudo kill -9 PID
You can now remove the lock and reconfigure
dpkg:sudo rm /var/lib/dpkg/lock-frontend sudo dpkg -configure –
aDid it work for you? What method arranged it for you?
/>
I hope this little tip helped you fix the error “Could not get error “Could not lock /var/lib/dpkg/lock”. If yes, let me know which method worked for you in the comments.
If you still have problems, please let me know. I will try to help you.
Any other suggestions are also welcome in the comments.