Jenkins is an open-source, extensible continuous integration and continuous deployment server. It is used to automate the continuous integration and continuous deployment (CI/CD) process. The importance of monitoring remote jobs and interacting with team members for stable code is immense; Jenkins takes care of all these requirements and enables seamless integration across Jenkins plugins, pipelines, and environment variables.
If you are among typical Jenkins users who want to increase their knowledge of CI and CD, some fundamental concepts must be learned. In this Jenkins tutorial, we will learn about the critical concept of Jenkins pipeline environment variables. We will also see and install the LambdaTest Jenkins plugin and use the built-in variables from the Jenkins environment variable list.
So, let’s get started!
What are Jenkins pipeline environment variables
?
When writing the script for a Jenkins pipeline, some dynamic values must be injected and used. These are especially useful to avoid encoding every value in the pipeline. For this dynamic integration, Jenkins set environment variables.
The Jenkins environment variable
is a global variable, exposed through the env variable and used in Jenkins pipelines and anywhere in Jenkinsfile. Any value stored as an environment variable in the env variable is of type string.
Jenkins pipeline environment variables
provide benefits such as:
Injection of sensitive data at run time
- to avoid coding in the
- Adding job parameters available only at run time, but not at design time. Boolean
- values set in environment variables help certain stages of toggling in a pipeline through a parameter that describes a specific subset of tests that you want to run
- Provide identifiers for credentials defined in Jenkins.
pipeline.
.

In the Jenkins pipeline, there are many useful environment variables
that can be accessed and maintained during build execution; Some of the most useful are: env: env is used to access Jenkins pipeline environment variables
- in groovy code such as env. VARNAME or simply as VARNAME. The env prefix also accesses the environment variables provided in the Jenkins pipeline.
- currentBuild: As the name suggests, addresses the currently running build of the Jenkins pipeline.
- Parameters: All parameters provided for successful compilation from a read-only map with multiple variables written. They can be accessed through parameters.
- docker: This is to provide convenient access to Docker-related functions in a Jenkins pipeline Groovy script.
To facilitate the construction of the pipeline, Jenkins has provided us with a list of Jenkins environment variables. This list contains some of the most commonly used variables. Let’s start by navigating through the list of environment variables.
Viewing the list
of Jenkins environment variables
Jenkins exposes the crucial characteristics of components using environment variables. Therefore, a set of these variables are already defined by Jenkins. This includes information about the job and the specific build being run. Some of the most commonly used variables are:
The list of Jenkins environment variables can be viewed in two different ways
.
1. Via env-vars.html :
Environment variables can be viewed in an HTML page. You must open the page on your Jenkins controller server. The steps to view
the list of Jenkins environment variables are: In the chrome address bar, type ${YOUR_JENKINS_HOST}/env-vars.html.
- The ${YOUR_JENKINS_HOST} itself is an environment variable that defines the Jenkins host address / Jenkins URL (which would be http://localhost:8080/).
- And env-vars.html is the HTML file consisting of the list of all Jenkins environment variables.
- The page looks like this :
The page looks like this: <img src="https://www.lambdatest.com/blog/wp-content/uploads/2021/04/Jenkins-Env-Var-1-1024×518.png" alt="
” />
2. Via the Windows batch script/
shell command:
You can also enumerate all environment variables by typing the shell command in the Jenkins pipeline groovy script. The steps to do the same are:
- Create a new pipeline in Jenkins, called ‘envvars‘
- the pipeline script, type the following groovy script.
. In
The Windows batch command used here is “set“. This command lists all the Jenkins pipeline environment variables in the logs. For Linux/Unix, you can use the “printenv” shell command, such as :sh ‘printenv’. This can be viewed as:
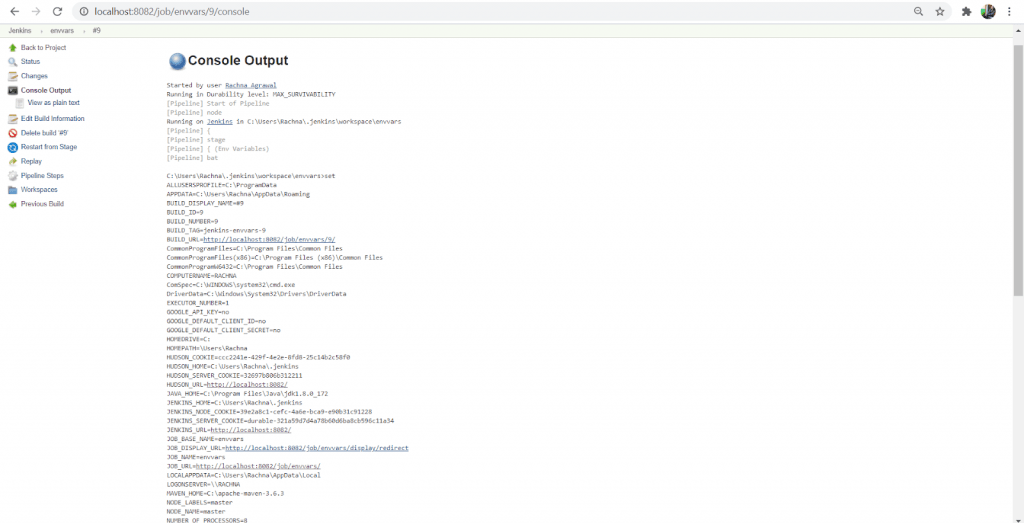
Reading Jenkins Environment Variables In this section, we’ll look at how you can read your list
of Jenkins environment variables
. Let’s go step by step-
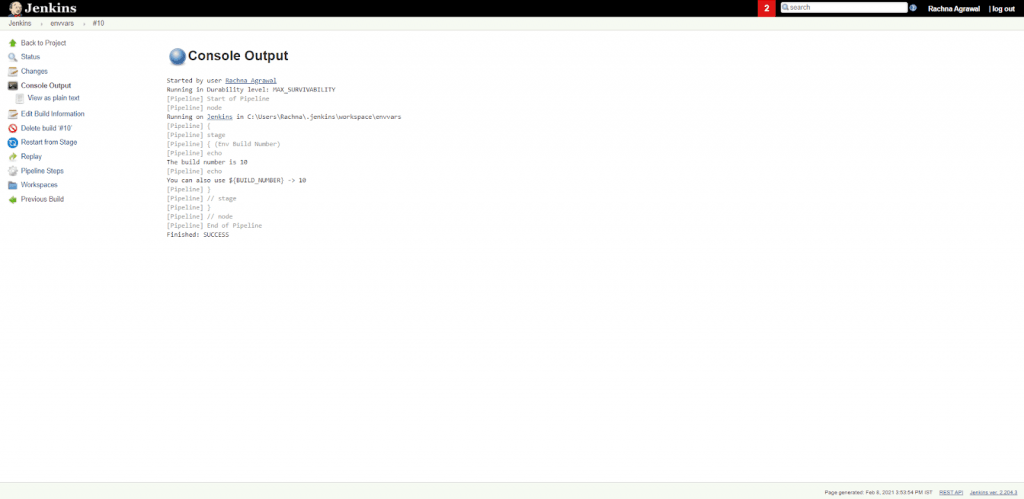
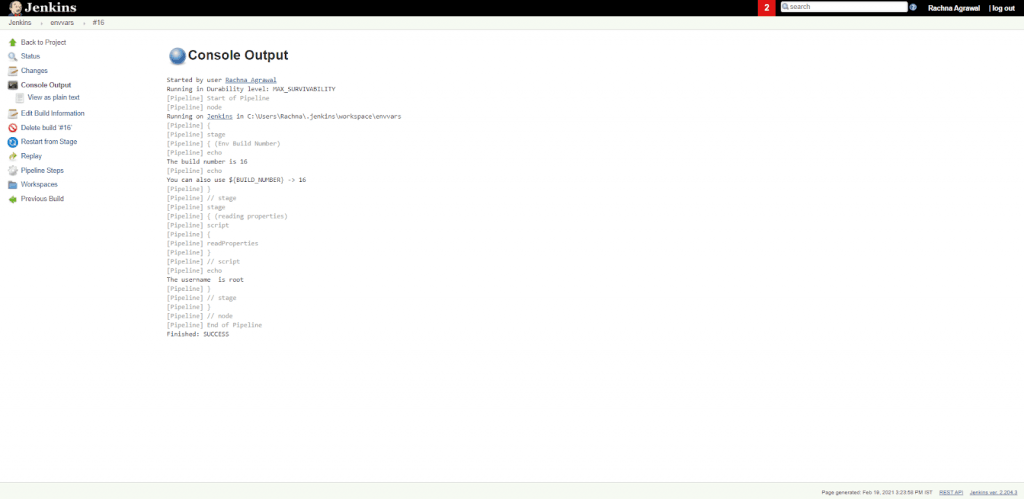
- To access Jenkins environment variables in a pipeline, you can use the env object, for example. Env. BUILD_NUMBER will give the current build number of a pipeline. The reference to the Jenkins pipeline environment variables is made by surrounding it by ${} as follows: ${env. BUILD_NUMBER}
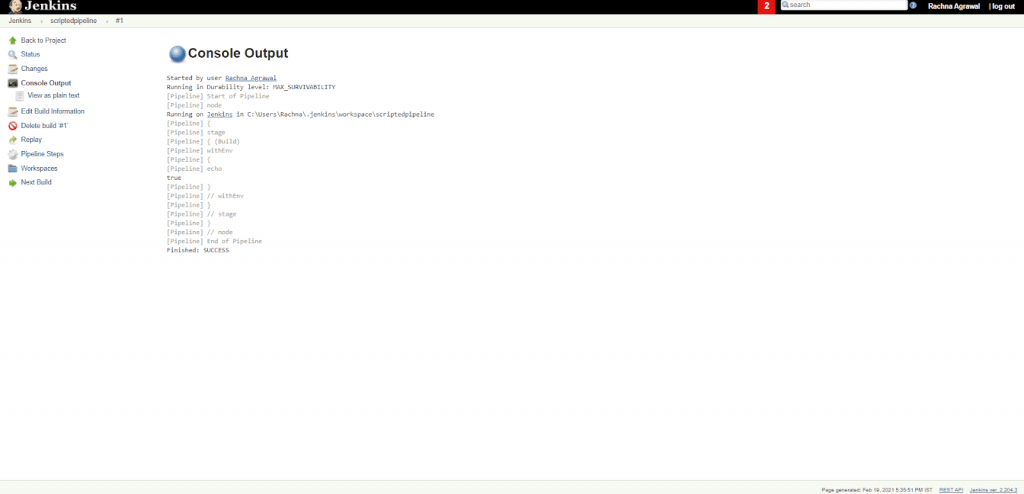
- You can also use the short version, which is BUILD_NUMBER. But this variant is quite confusing for some users. The script to read
the build number through environment variables is: The console output of the build processed through the above script is:
Jenkins Environment Variable Configuration
Jenkins
environment variables They are established both globally and locally. Global environment variables can be set through the Jenkins user interface, and local environment variables are set according to the pipeline, either declarative or scripted. Jenkins pipeline environment variables can also be read from a properties file. To do this, we use the Pipeline Utility Steps plugin. You can also inject the variables during build startup through the EnvInject plugin.
Therefore, the different ways to set Jenkins environment variables are:
1. Creating
global environment variables
Global environment variables are the variables that can be used in any pipeline or job created in Jenkins. Global variables are set through the Jenkins console and through the cool script of a pipeline. The ways to set these global environment variables are
: Using the
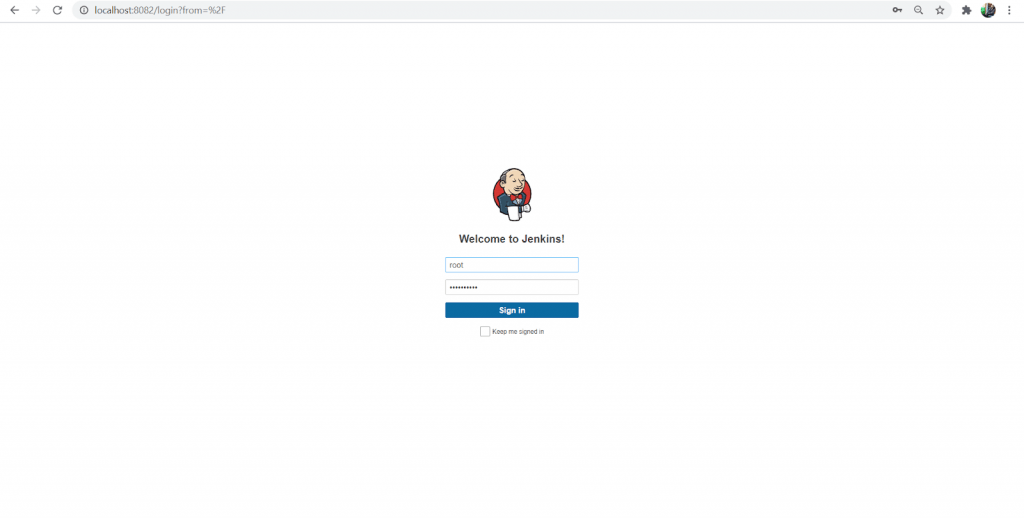
- Jenkins console: Log in to the Jenkins Server first.
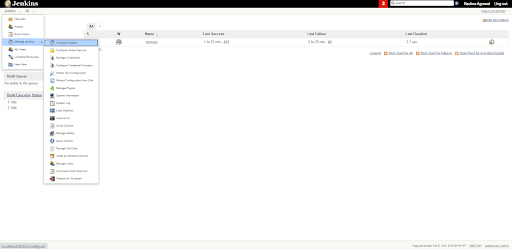
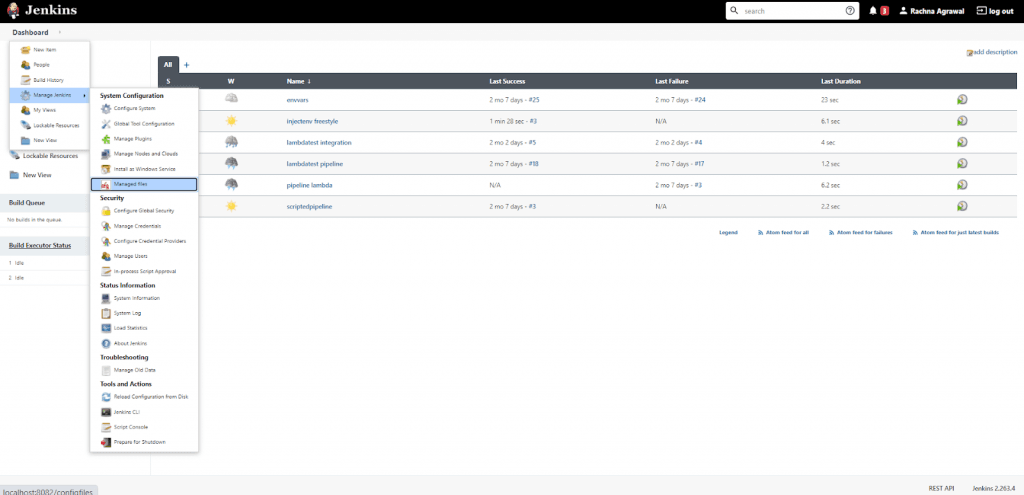
At the top left, you’ll find a drop-down menu to
- the
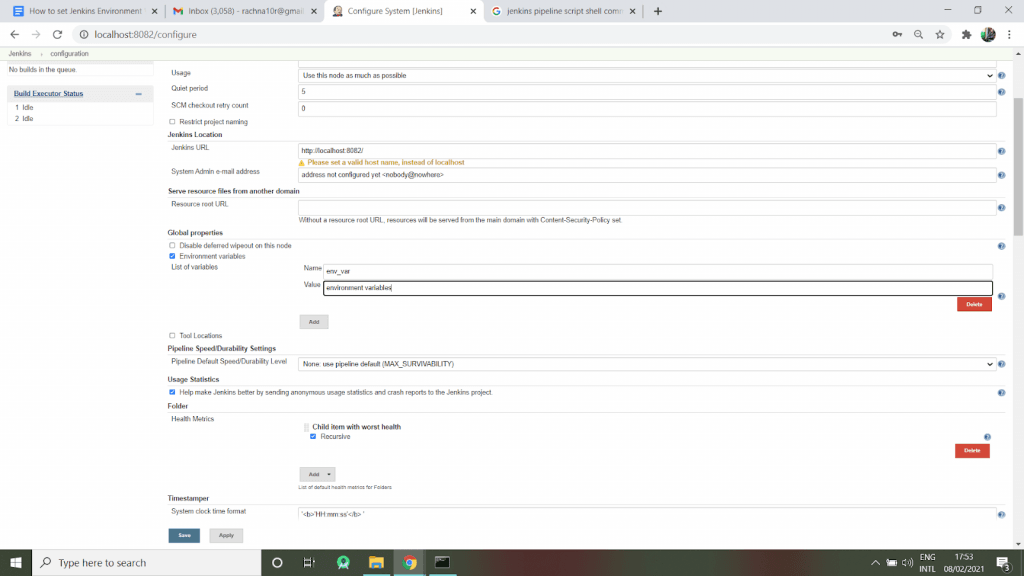
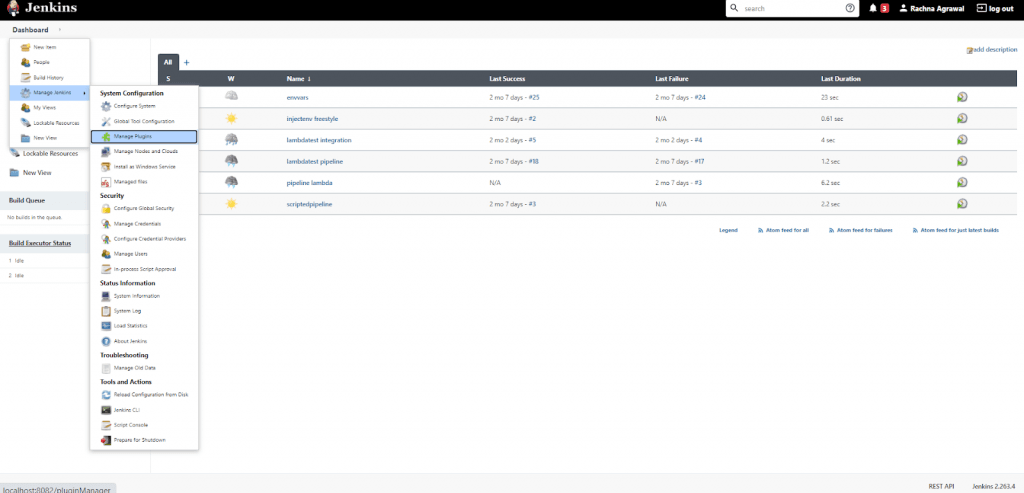
right of Jenkins; Select the drop-down menu. In the drop-down menu, you will find an option to Manage Jenkins. Please click on it. In the Manage Jenkins window, click Configure System. Here, you can configure global properties, commands, and much more.
Locate the Global Properties section. In the Global Properties section, check the Environment variables box. When you check the box, the button to add the list of Jenkins environment variables appears.
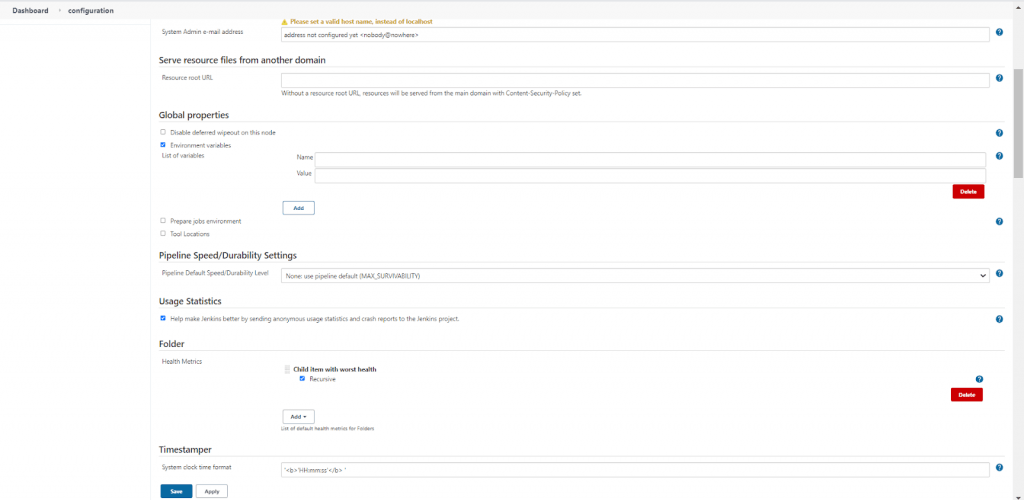
Click Add. Two fields appear: Name and Value. You can provide multiple environment variables by clicking the add button. This can be seen as:
Using Java code in Groovy Script: You can create
- Jenkins environment variables using Java code in the Groovy script. This code will be written in the pipeline script section when a new pipeline is created.
- The required code is:
In java, the createGlobalEnvironmentVariables() method is used to create new global environment variables. Here, the environment variable named “Var1” is created with the value “Dummy”.
- Using
the Jenkins file: You can populate the environment variable using a Jenkins file. There may be a file in
- the code repository where some application configuration properties are saved, or the file would be available on the file share somewhere
- from a file
- This is the Pipeline Utility Steps plugin.
. There is a plugin in Jenkins that can be used to read these properties
.
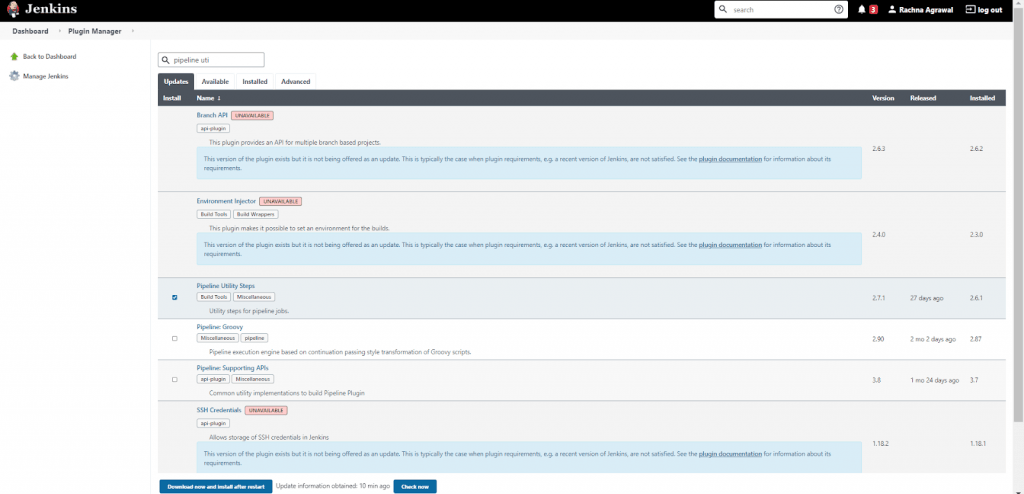
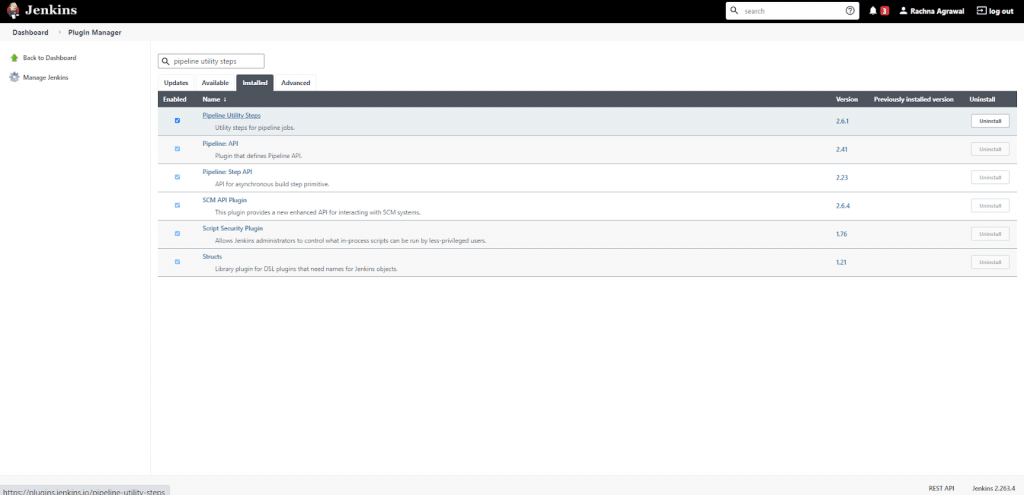
So, first install the Pipeline Utility Steps plugin. This provides the readProperties step, which makes it easier to read the properties of a file. Click Manage Jenkins in the left column. Select Manage Add-ons and go to the Available tab.
In the filter box, type pipeline utility steps. You will find the add-in in the list, select the check box in front of Pipeline Utility Steps, and click the install button. After a successful installation, you will find the required plugin in the Installed tab.
Also, define the Java .properties file with some key/value pairs. The properties file is used to store the username, password, access tokens, etc., which cannot be encoded due to privacy. As shown below:
You can then read these values from the properties file using step . readProperties, provided by the Pipeline Utility Steps plug-in.
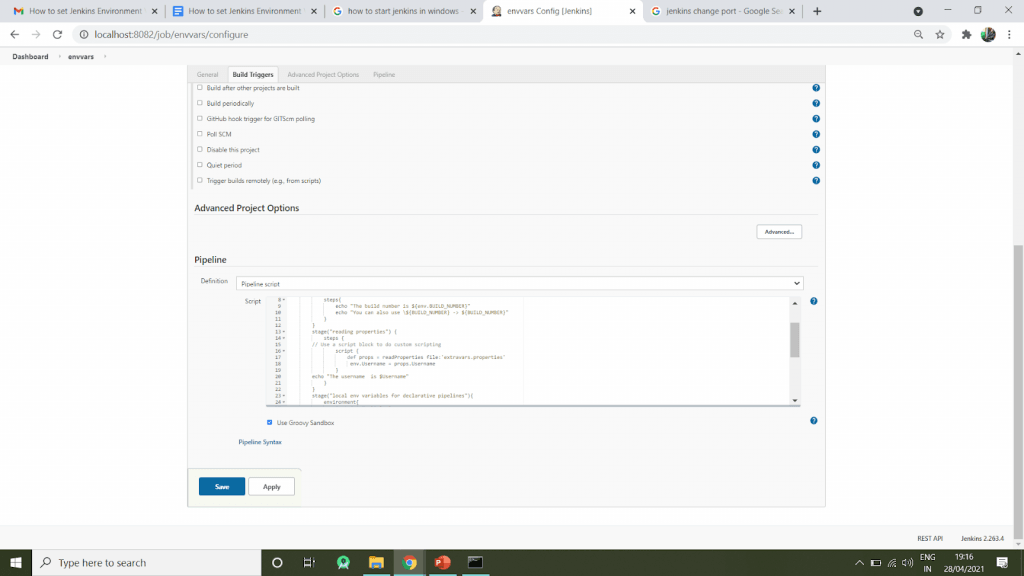
To read and use the key-value pairs, you need to write the next stage in your cool script. This way, you can read the properties of the file and save them as environment variables. Remember, Jenkins will look for the properties file in the local workspace. If the file is not present in the local workspace, provide the path to the properties file. The output to the above groovy script to read the properties file will be:
2. Creating Local Environment Variables Local
environment
variables
are the variables explicitly defined for a particular job in Jenkins. These are defined according to the pipe and its type. There are declarative pipelines as well as scripted pipelines. Jenkins declarative pipelines divide stages into individual stages that can contain multiple steps; Scripted pipelines, on the other hand, use cool code and references within stages without any extra effort. Because of this difference, the code for creating local environment variables is different for the two types of pipelines.
Using declarative pipeline: Jenkins
- declarative pipeline
- uses an environment policy to define local environment variables. The environment directive looks like this: the environment directive
can be placed at the beginning of the pipe. The variable declared in the policy can then be used in all steps. The great code for it is: The directive can also be placed in the stages. Therefore, that variable can only be used in steps of that particular stage. The output of the above groovy script is:

- Using Scripted Pipeline:
- Create nodes for the scripted pipeline
- For scripted pipelines, use withEnv to define local Jenkins environment variables. The withEnv([“env=value]) {} block can also be used to override any environment variable.
- The simple code for declaring locale variables is:
.
The output to the above groovy script will give the value of the environment variable ‘DISABLE_AUTH’:
3. Injecting environment variables
into freestyle projects
Jenkins environment variable injection can be done with the help of a plugin. This plugin is the EnvInject plugin. You can install the EnvInject plug-in and inject the environment variables during build startup. This allows you to set up a custom environment for all Jenkins jobs. This plugin is massively used in Jenkins freestyle projects. The steps that demonstrate the use of the EnvInject plug-in are:
- Log in to the Jenkins server with your credentials
.
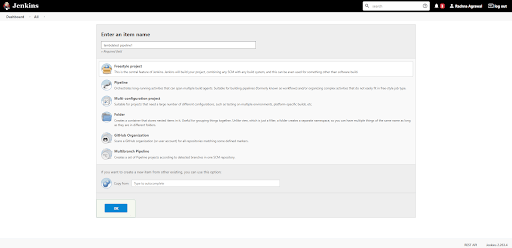
On the left side, you will find the New Item option. Click on that and a new window will pop up.
Enter the part name and select the item type from the available types, such as freestyle project, pipeline, multibranch pipeline, folder, and so on. You can provide the name of an existing job if you want this job to be your replica, or you can leave it blank and then click OK.
Your freestyle project is created. Click Configure to modify the project and inject Jenkins environment variables.
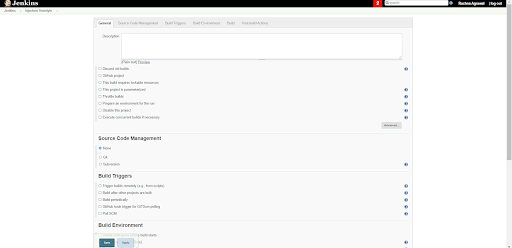
In the Source Code Management section, select the None option, as we are not getting code from any code repository. You can choose Git if you want to get the code from a Git repository.
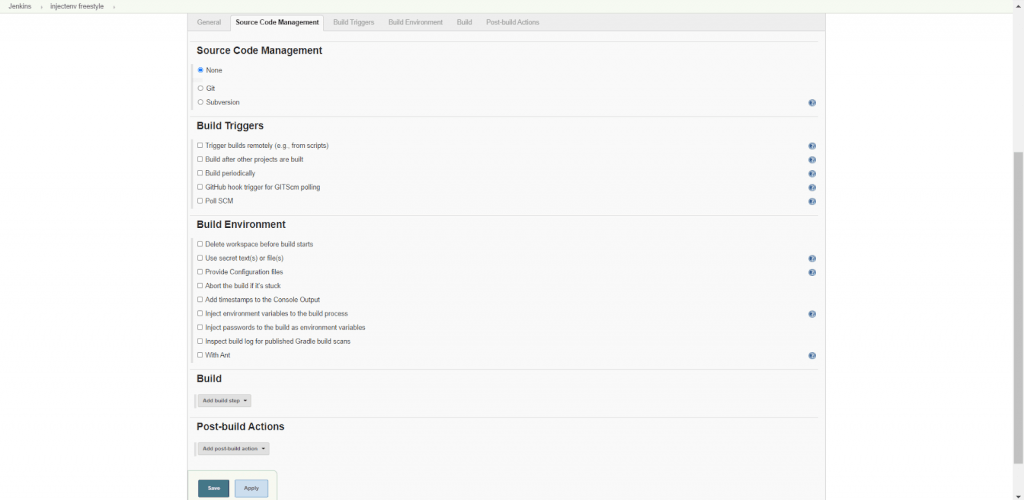
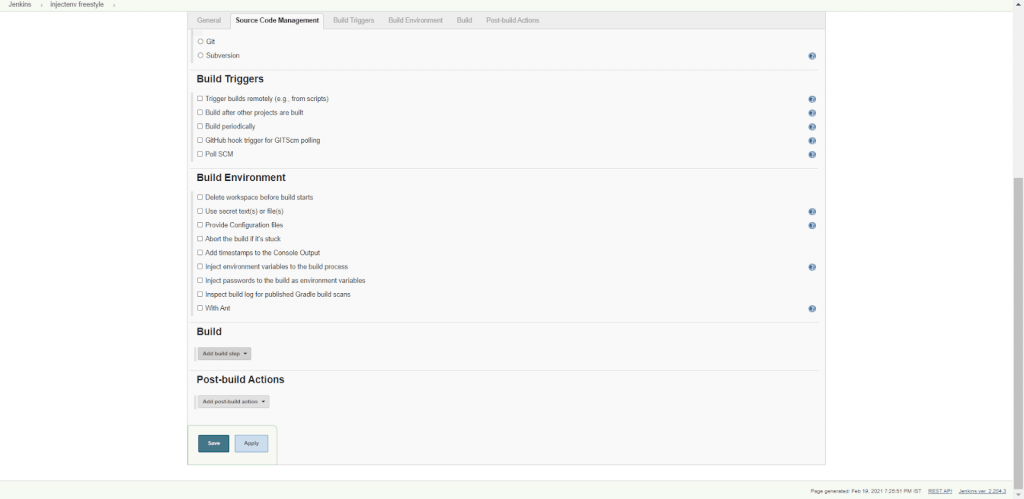
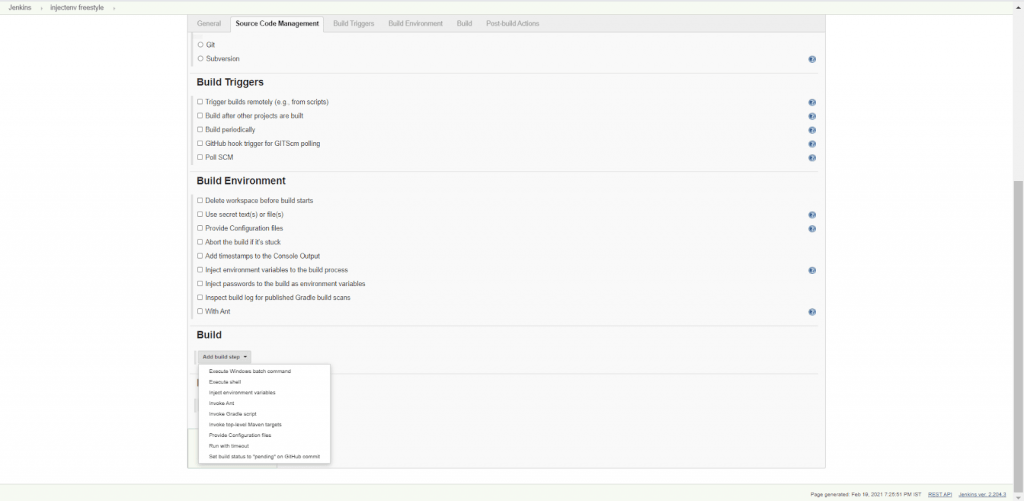
You can also select check boxes in the Build Triggers and Build Environment section to perform the required configuration. In the Build section, click the Add build steps drop-down menu. (This provides the steps performed before a successful build occurs.)
Select Inject Environment Variables from the drop-down menu. A dialog box is added to the build section.
In this box, specify the path of the properties file if you have the environment variables defined in a separate properties file. You can also add environment variables in the property content directly without specifying the file path. Here, ‘Username’ is the environment variable with ‘root’ as its value.
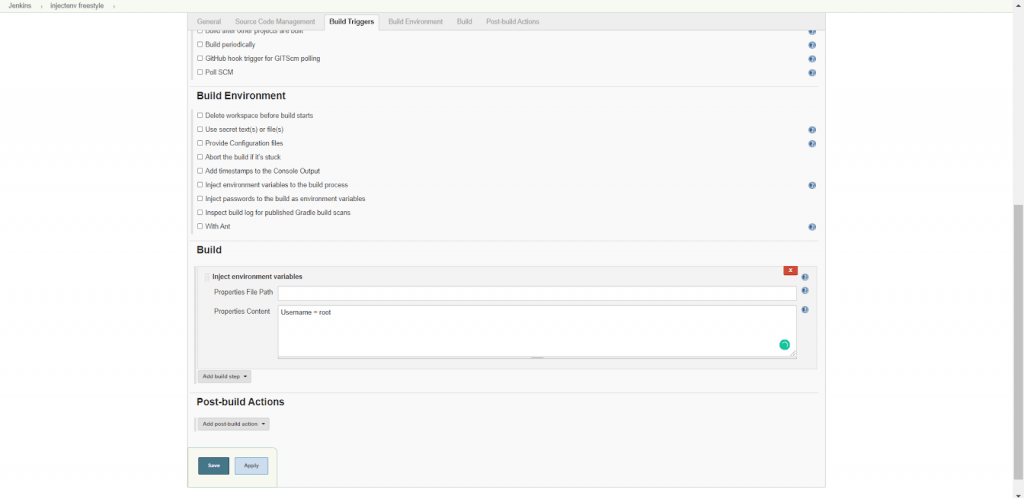
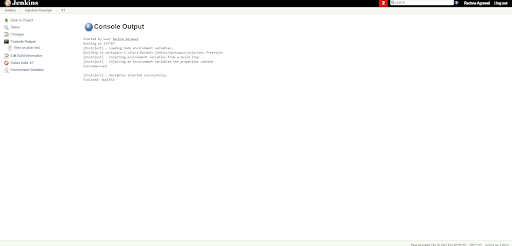
You can also select an option from the drop-down menu, Post-build actions to be performed after successful build. Click Save and Apply. The freestyle project has been configured correctly. The output shows that the given environment variable is injected correctly.
Capturing
the output of the bat command in the environment variable You can capture the output of
a shell command or batch command as a Jenkins environment variable and use it in later stages of the pipeline. For that you need to use the exact syntax given – bat(script: ‘cmd’, returnStdout:true). This is to force the bat command to return the output to be captured and stored in an environment variable. The steps to store
the output in a Jenkins environment variable are: Here, we have
- taken the dir command, and we will capture its output in an environment variable called LS.
- We used a script block to save the output in LS, and then accessed the same variable and displayed the saved content.
- cool script that works for the same thing is: The
The
trim() method is used to avoid the new line character present in the batch output. It also eliminates white space from the beginning and end of the captured output. The console output of a successful build for the pipeline that captures the bat output in an environment variable is:
<img src
=”https://www.lambdatest.com/blog/wp-content/uploads/2021/04/Jenkins-Env-Var-22-1024×497.png” alt=”” /> On Linux/Unix, you can capture the output of the shell command to the Jenkins environment variable. Because the shell commands are different, the syntax will be changed. This will be sh(script:’ls -lah’, returnStdout: true).trim().

Jenkins Set environment variables
using the LambdaTest plugin
As you make it easier to install an add-in, new environment variables are added to the list of Jenkins environment variables. Here, we’ll install the LambdaTest Jenkins plugin and look at the environment variables added by this plugin.
The LambdaTest Jenkins plugin helps accelerate the pace of your automated cross-browser test cycles. This easily automates your Selenium test scripts by connecting the Jenkins instance to the LambdaTest Selenium Grid. LambdaTest offers you an extensive library of 3000+ browser and browser versions to achieve greater test coverage while performing automation tests using the Selenium suite. You can view the steps to install the LambdaTest Jenkins plugin by clicking here. Some new environment variables added due to the LambdaTest Jenkins plugin are: