Brief: In this guide, we explore how to install QEMU/KVM on Ubuntu to create virtual machines.
Virtualization is one of the most widely used technologies in both business and home environments. Whether you’re an IT expert, a programmer, or an IT novice, virtualization can be one of your best friends.
Virtualization is the abstraction of a computer’s hardware resources using a software application known as a hypervisor. The hypervisor creates an abstraction layer on top of the computer hardware and virtualizes various system components, including but not limited to memory, processor, storage, USB devices, etc.
In doing so, it allows you to create virtual machines also known as virtual machines from the virtualized elements, and each virtual machine, also known as a guest, runs independently of the host system.
KVM, short for Kernel-based Virtual Machine is an open source Type 1 hypervisor (bare metal hypervisor) that is built into the Linux kernel. It allows you to create and manage virtual machines running variants of Windows, Linux, or UNIX such as FreeBSD and OpenBSD.
As mentioned earlier, each virtual machine has its own virtual resources, such as storage, memory, CPU, network interfaces, USB interfaces, and video graphics, to name a few.
QEMU (Quick Emulator) is a software module that emulates various components of computer hardware. It supports full virtualizations and works in conjunction with KVM to provide a holistic virtualization experience.
In this guide, we will demonstrate how to install QEMU/KVM on Ubuntu 20.04/22.04 distributions.
Step 1: Check Virtualization Enabled in Ubuntu
To get started, check if your CPU supports virtualization technology. The system must have an Intel VT-x processor (vmx) or an AMD-V processor (svm).
To verify this, run the following egrep command.
$ egrep -c ‘(vmx|svm)’ /proc/cpuinfo
If virtualization is supported, the output must be greater than 0, for example, 2,4,6, and so on
.
Alternatively, you can run the following grep command to display the type of processor that your system supports. In our case, we are running Intel VT-x denoted by the vmx parameter.
$ grep -E -color ‘(vmx|svm)’ /proc/cpuinfo <img src="https://www.tecmint.com/wp-content/uploads/2018/06/Enable-Virtualization-in-Ubuntu.png" alt="Enable virtualization in
virtualization in Ubuntu
Equally important, check if KVM virtualization is supported by running the following command: $kvm-ok Check KVM virtualization
If the KVM-OK utility is missing command, install the CPU-Checker package as follows
. $ sudo apt install cpu-checker -y
Now that we have verified that our system supports KVM virtualization, let’s proceed and install QEMU. Step 2: Install QEMU/KVM
on Ubuntu 20.04/22.04
Next, update the package and repository lists
as follows. $ sudo apt update
Thereafter, install QEMU/KVM along with other virtualization packages as follows:
$ sudo apt install qemu-kvm virt-manager virtinst libvirt-clients bridge-utils libvirt-daemon-system -y <img src="https://www.tecmint.com/wp-content/uploads/2018/06/Check-KVM-Virtualization-in-Ubuntu.png" alt="Install
Let’s examine what role each of these packages plays
.
- qemu-kvm – This is an open source emulator that emulates a computer’s hardware resources
- virt-manager – A Qt-based graphical user interface
- virtinst: collection of command-line utilities for creating and making changes to virtual machines.
- libvirt-clients – Client-side APIs and libraries for managing virtual machines from the command line.
- bridge-utils: Set of command-line tools for managing bridge devices.
- libvirt-daemon-system: Provides the configuration files required to run the virtualization service.
.
for creating and managing virtual machines using the libvirt daemon.
At this point, we have installed QEMU and all essential virtualization packages. The next step is to start and enable the libvirtd virtualization daemon.
Therefore, run the following commands:
$ sudo systemctl enable -now libvirtd $ sudo systemctl start libvirtd
Next, check if the virtualization service is running as shown.
$ sudo systemctl status libvirtd 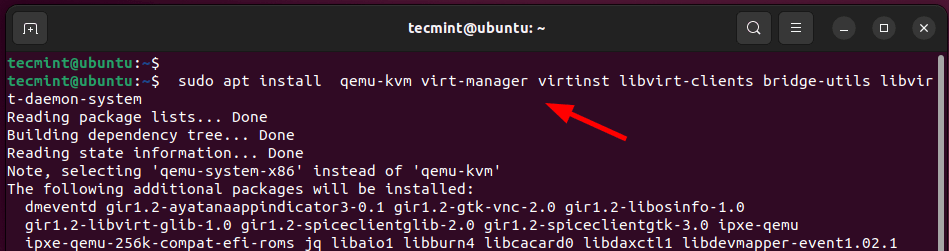 Start libvirtd Virtualization Service From the above output,
Daemon is up and running as expected. Also, add the currently logged in user to the kvm and libvirt groups as shown.
$ sudo usermod -aG kvm $USER $ sudo usermod -aG libvirt $USER
Step 3: Launch
Virtual Machine Manager on Ubuntu The
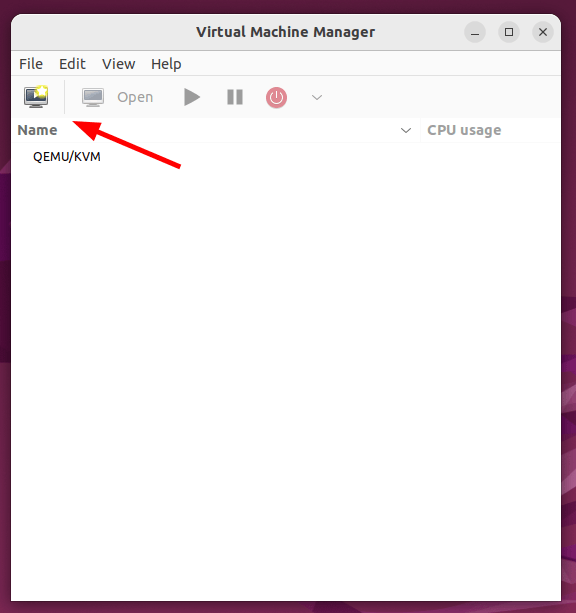
next step is to launch the QEMU/KVM GUI tool which is Virtual Machine Manager
. $ sudo virt-manager
The Virtual Machine Manager will appear as shown. From here, you can start creating and managing virtual machines as we’ll demonstrate shortly.
<img src="https://www.tecmint.com/wp-content/uploads/2018/06/Start-libvirtd-Virtualization-Service.png" alt="Qemu Virtual Machine Manager
Virtual Machine Manager
Step 4: Create Virtual Machine with QEMU/KVM on Ubuntu
In this section, we will demonstrate how you can create a virtual machine using an ISO image. For demonstration purposes, we will use a Fedora Live ISO image. You can use an ISO image of your preferred operating system and follow it.
To get started, click on the icon in the upper left corner as shown below.
<img src="https://www.tecmint.com/wp-content/uploads/2018/06/Qemu-Virtual-Machine-Manager.jpg" alt="Create virtual machine in
Since we are creating a virtual machine from an ISO file, select the first option: ‘Local installation media (ISO image or CDROM)‘. Then click ‘Forward‘.
 Choose VM Install Type
Next, click ‘Browse‘ to navigate to the location of the
ISO file. <img src="https://www.tecmint.com/wp-content/uploads/2018/06/Choose-VM-Install-Type.png" alt="Choose
ISO File
Since the ISO file is saved locally on your system, we will click on ‘Browse Local’. <img src="https://www.tecmint.com/wp-content/uploads/2018/06/Choose-VM-ISO-File.png" alt="Browse Local
File
System
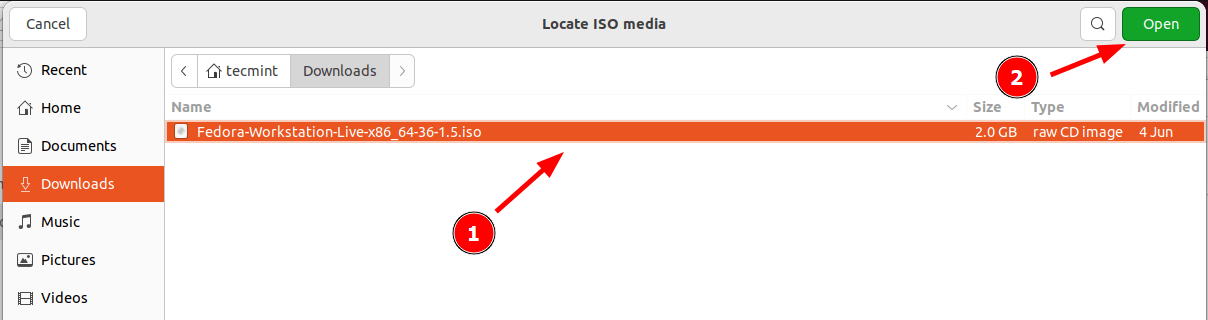
Be sure to navigate to the location of your ISO file. Click on it and then click ‘Open‘.
<img src="https://www.tecmint.com/wp-content/uploads/2018/06/Browse-Local-Filesystem.png" alt="Choose OS ISO File
Before proceeding, make sure you have selected the operating system from the drop-down menu. Then click ‘Forward‘.
Click ‘Yes‘ in the pop-up window to grant search permissions to the emulator for the ISO file.

Next, select the Memory Size and number of CPU cores and click ‘Forward‘
. <img src="https://www.tecmint.com/wp-content/uploads/2018/06/Grant-Permission-on-emulator.png" alt="Choose CPU and VM memory settings
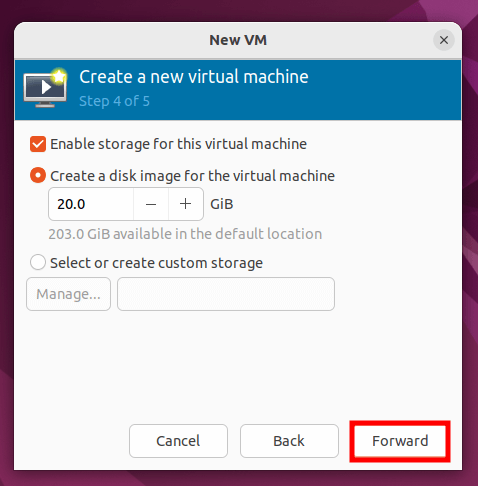
In the next step, enable storage for the virtual machine and specify the size of the virtual disk. Then click ‘Forward‘.
<img src="https://www.tecmint.com/wp-content/uploads/2018/06/Choose-VM-Memory-and-CPU-Settings.png" alt="Choose VM Disk Size
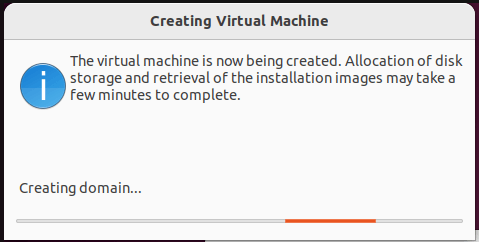
Finally, review all the settings you have defined, and if everything looks good, click ‘Finish‘ to create the virtual machine. Otherwise, click ‘back‘ and make the necessary changes.
 Review Virtual Machine Configuration
Once you click ‘Finish‘, the VM administrator will start creating the VM based on the configured configurations.
<img src="https://www.tecmint.com/wp-content/uploads/2018/06/Review-VM-Settings.png" alt="Creating
virtual machine in
And in a matter of seconds, the virtual machine installation wizard will appear. You can continue with the installation as you would on a physical system.
 Virtual Machine
Additionally, the virtual machine
will appear in the virtual machine manager as shown. By right-clicking on your virtual machine, you can perform a variety of tasks, such as pause, restart, reset, and delete the virtual machine, among many others.
<img src="https://www.tecmint.com/wp-content/uploads/2018/06/virtual-machine-installation.png" alt="Virtual Machine Manager VM Configuration
In this guide, we have demonstrated how to install QEMU/KVM on Ubuntu 20.04/22.04. In addition, we went a step further and created a virtual machine using an ISO image file.
To manage KVM virtual machines
, read our following articles:
How to
- manage virtual machines in KVM using Virt-Manager How
- Create a KVM Virtual Machine Template
to