Table of Contents
Each developer has deleted the wrong file from their project at least once. It may be a hastily executed ‘rm -rf’ command, or a distracted selection and deletion, or perhaps the result of a wrong script. Whatever the reason, deleting an important file can be problematic if it is not fixed immediately. When working with a team, accidentally deleting a file and then pushing it up can be catastrophic for other team members pulling the changes. Depending on the file, they will get an error right away or, in the worst case, the error will appear somewhere on the line, perhaps somewhere not so obvious, at which point it might be difficult to figure out the exact cause.
So now that you have accidentally deleted a file or files, how do you recover them? Since Git is a version control system, it has features to roll back a single file to a previous version, including deleted files.
In this tutorial, we’ll look at three ways to recover a deleted file: using the Git command line, using
GitHub’s web and application UI, and using a large-scale backup solution with BackHub
.
You can follow this tutorial by cloning the demo repository
.
Recovering deleted files using
the Git command line involves the ‘git restore’ or ‘git checkout’ command. Whenever you modify files in Git, including creating new files, editing, or deleting existing files, the changes start as non-tentative. It then organizes the changes with the ‘git add’ command and finally commits the changes using the ‘git commit’ command. Git provides ways to recover a deleted file at any point in this change lifecycle.
If you haven’t organized the deletion yet, simply run ‘git restore <filename>’ and the file will be restored from the index.
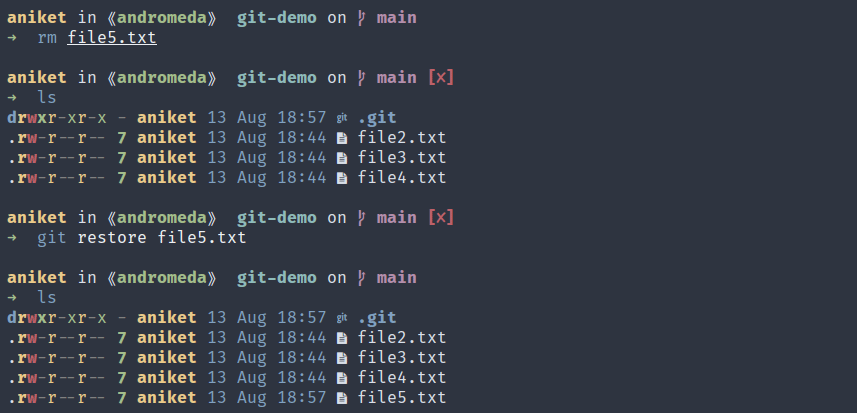
However, if you have organized the changes, running ‘git restore’ will throw an error as the file no longer exists in the index.
<img src="https://rewind.com/wp-content/uploads/2021/09/j3GWsH3.png?width=736&name=j3GWsH3.png"
>
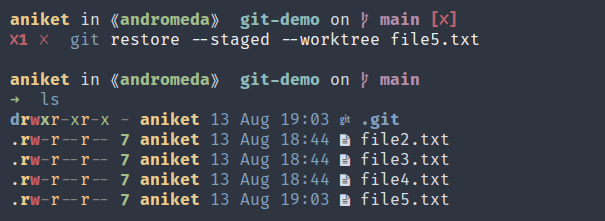
In this case, you need to run ‘git restore -staged -worktree <filename>’. The ‘-staged’ argument tells ‘git’ to restore the file to the index from HEAD, and the ‘-worktree’ argument tells Git to restore the work tree as well.
If you have deleted the file and have already committed the changes, you must use the ‘git checkout’ command to restore the file. First, you need to find out the checksum of the commit that deleted the file, and then extract the file from the previous commit.
In the demo repository, ‘file1.txt’ has already been deleted and confirmed. Let’s recover that file. To find out which commit deleted
‘file1.txt’, you need to use the ‘git rev-list’ command:
This command tells ‘git’ to list all the commits, which can be accessed from the HEAD, that changed the ‘file1.txt’ file. The ‘-n 1’ option tells ‘git’ to limit the result to a single commit. The result is the checksum of the commit that deleted the file. You can verify that this is the offensive commit by using the ‘git show’ command with the checksum:
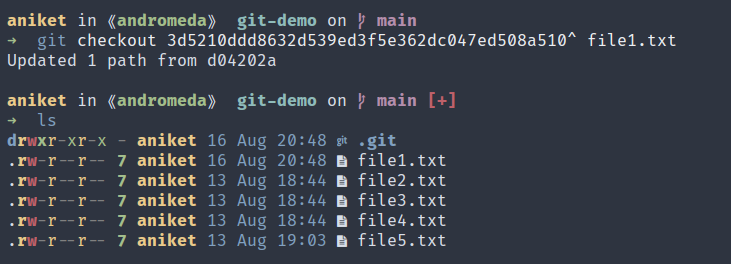
the commit before this
is the last commit where this file was present. You can restore the file from that particular commit by running the following command. The ‘^’ at the end of the commit hash tells Git to get the commit before it:
Pros and cons of using
the command line
This method is the fastest to perform as you only need access to the command line. However, it requires you to run different commands depending on your situation. Also, it may not be the easiest to master, and some developers may prefer a more visual approach.
Using the desktop application
GitHub
If you’re more comfortable with a graphical interface, you can use GitHub Desktop, which is available for macOS and Windows. As in the previous case, there are two scenarios: one in which you have not confirmed the deletion and one in which you have.
Any changes you make to your repository will appear in the staging area in the left sidebar of the app. There you can discard the changes, which works similarly to the ‘git restore’ command. If you haven’t confirmed the deletion yet, you can use this feature to quickly recover the deleted file.
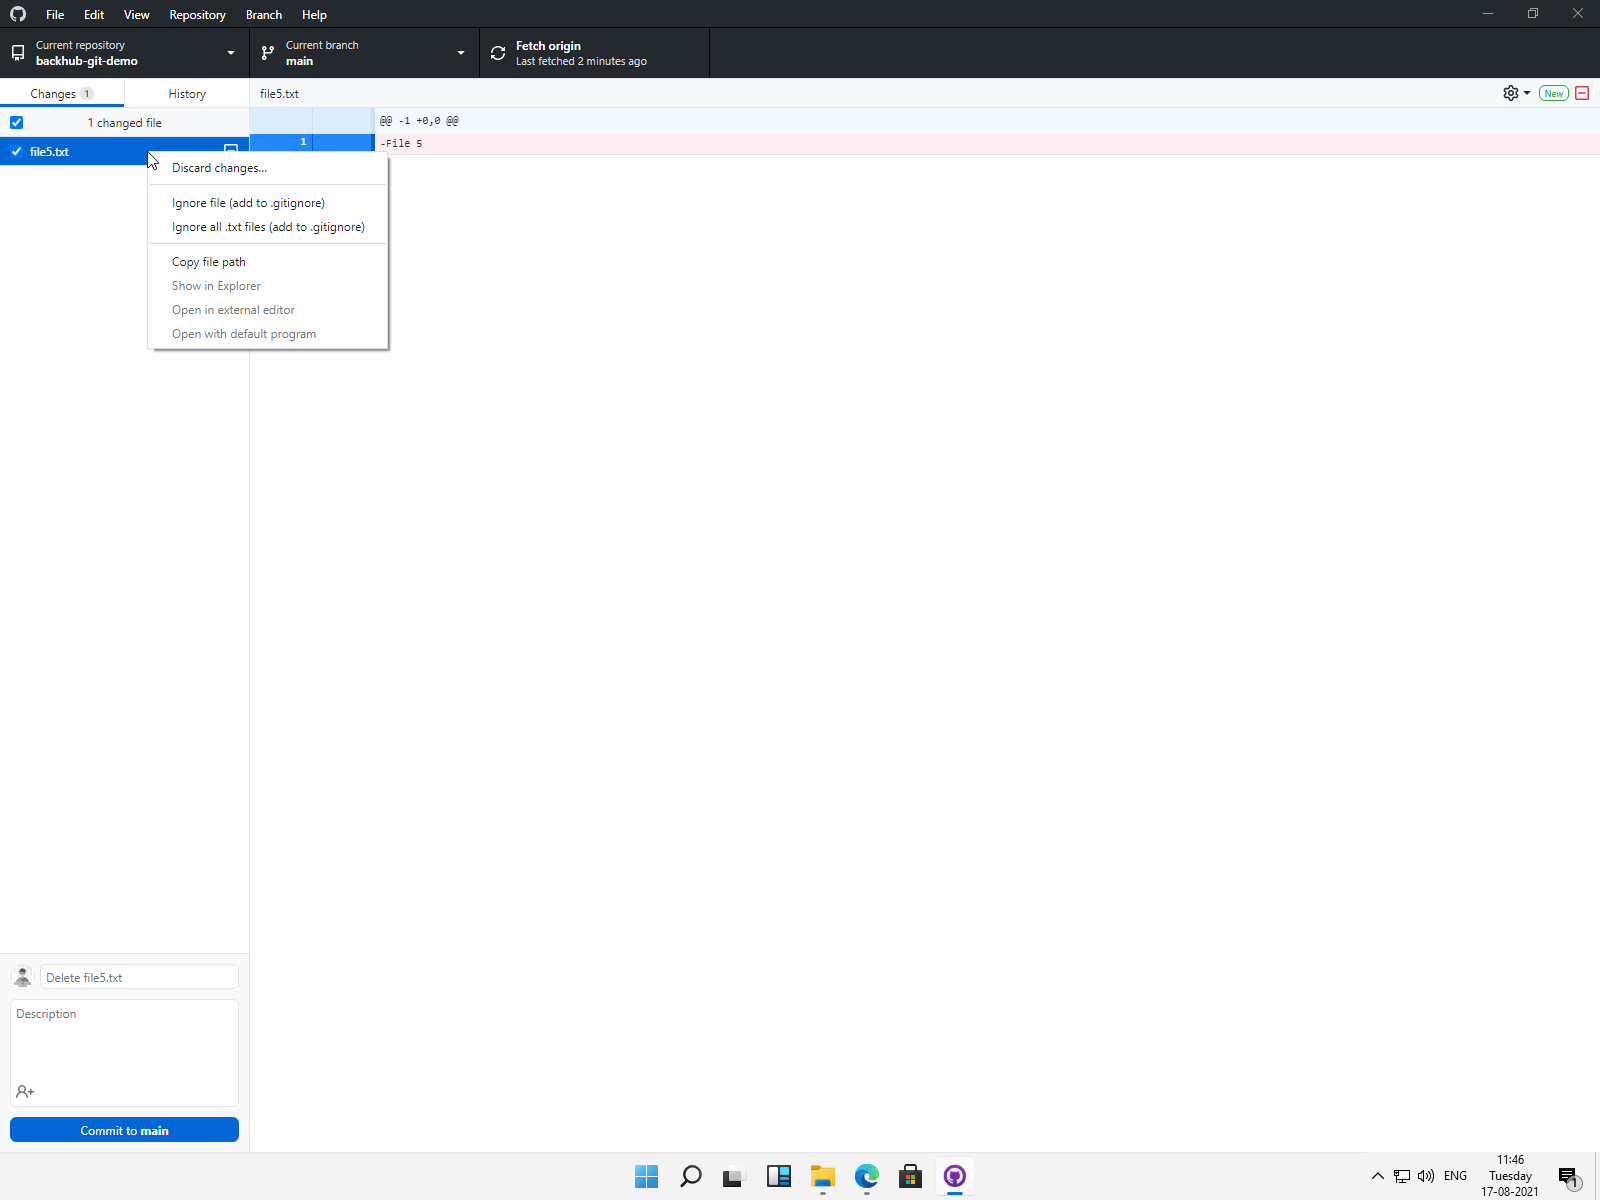
Go ahead and delete ‘file5.txt’ from the repository and return to GitHub Desktop. You should see the deletion in the staging area.
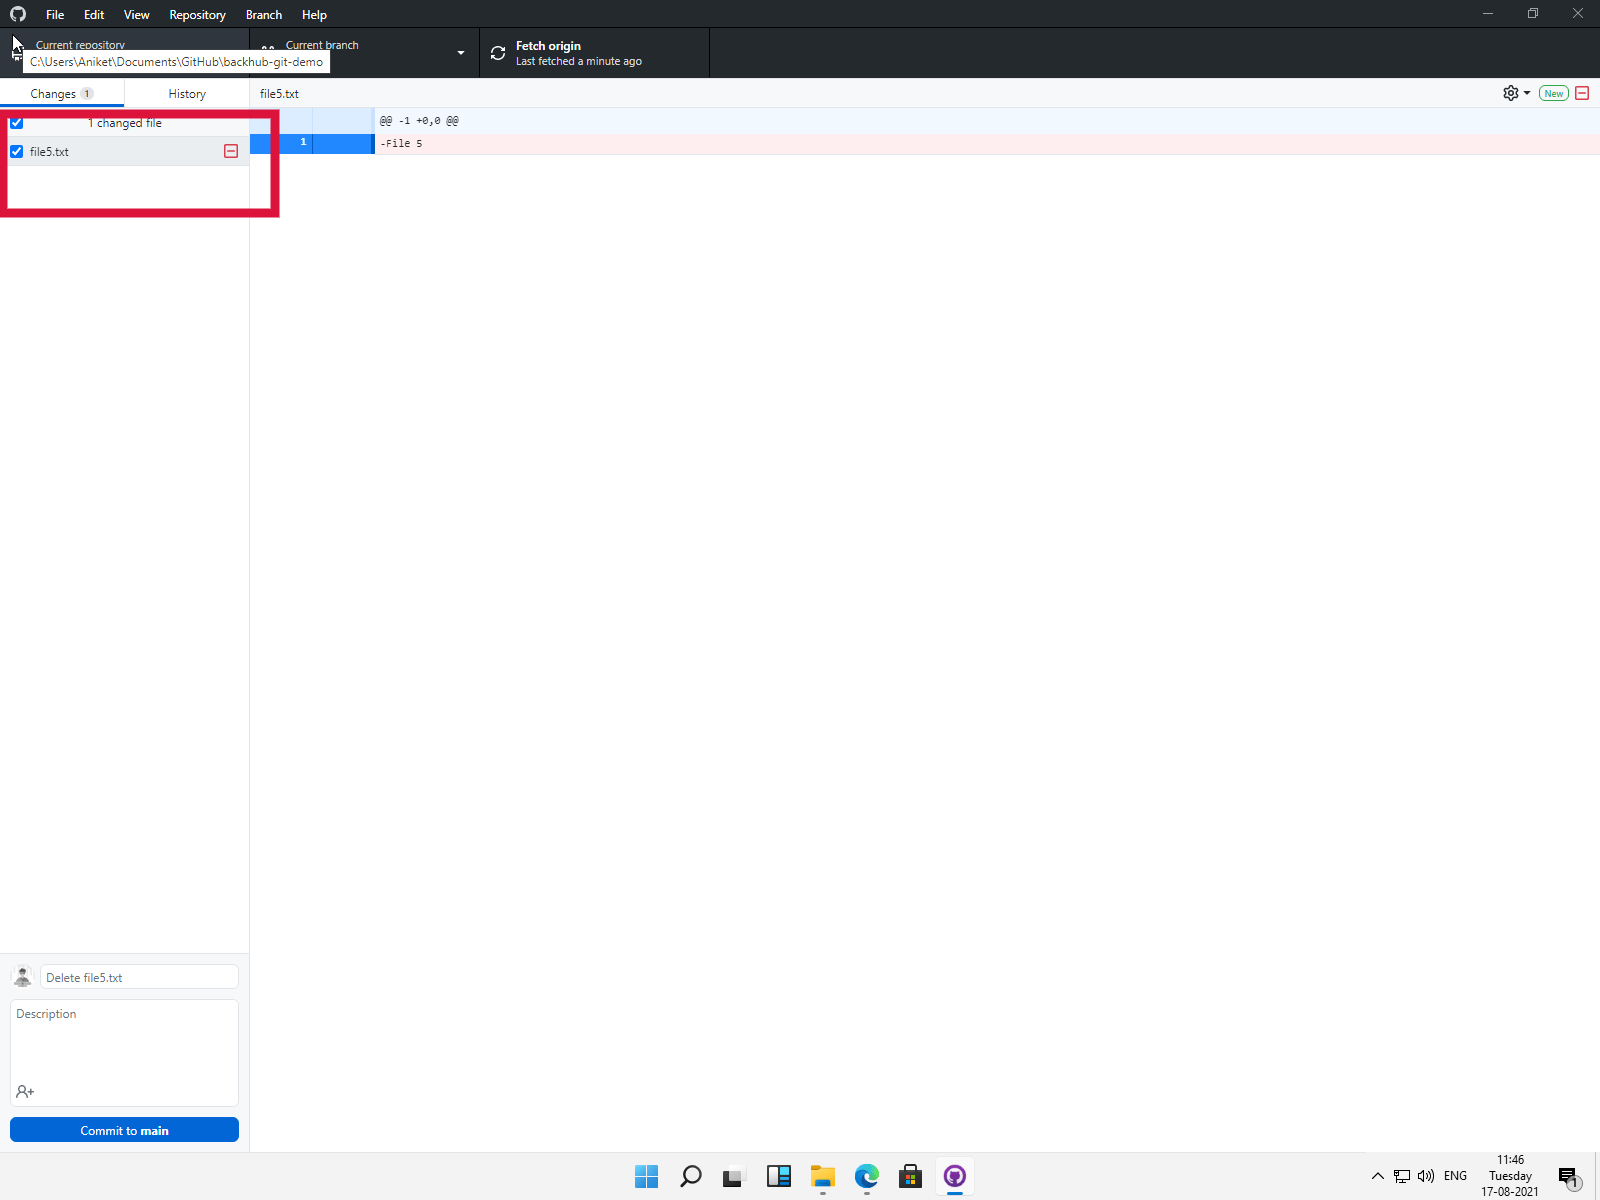 You can right-click the
change and click Discard Changes.
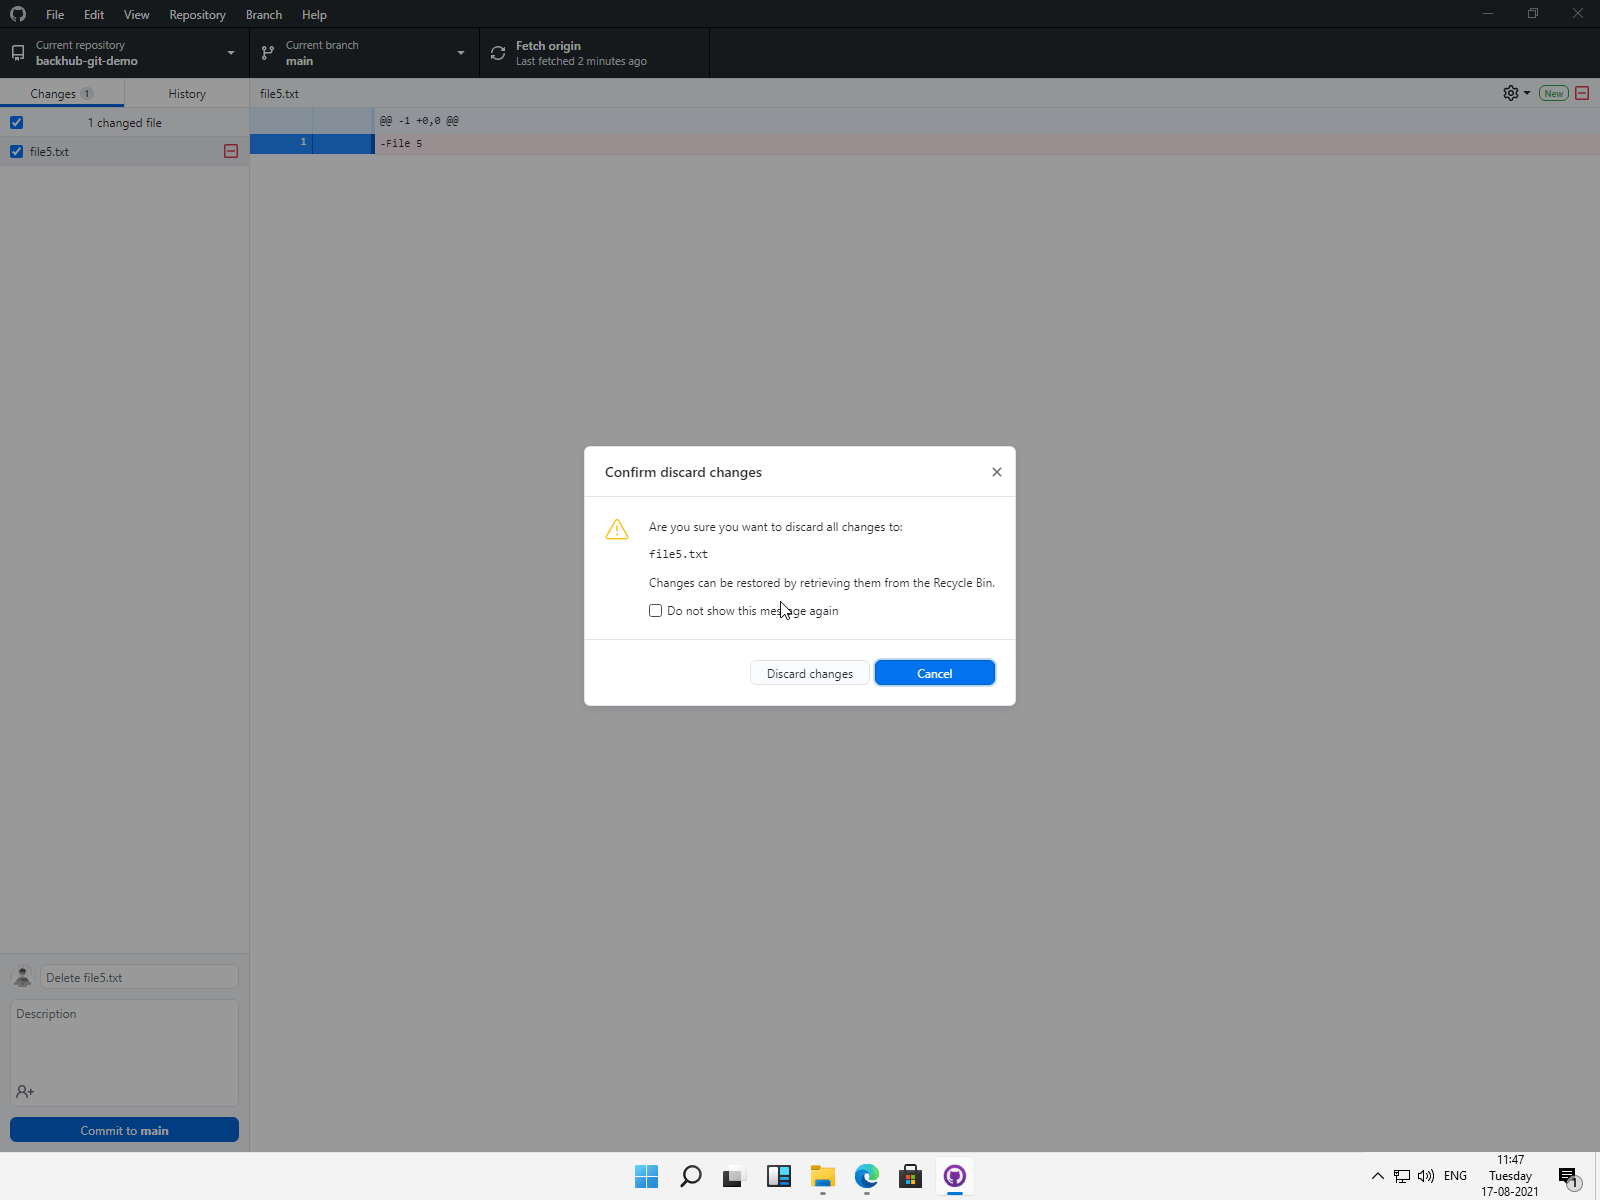
You will be asked for confirmation. Once confirmed, the change will be discarded and the deleted file will return to its place.
If you have already committed the change, you need to know the confirmation hash of the offending acknowledgement. There’s no way to do this from the GitHub desktop app, so you need to use the command line and run the ‘git rev-list’ command we discussed above.
Just like before, let’s restore the already deleted ‘file1.txt. First, you need to know the hash of the commit that deleted the file:
in the app, commits are listed with their names, not hashes. To know the name of the commit, you need to run the command ‘git show’ with the commit hash:
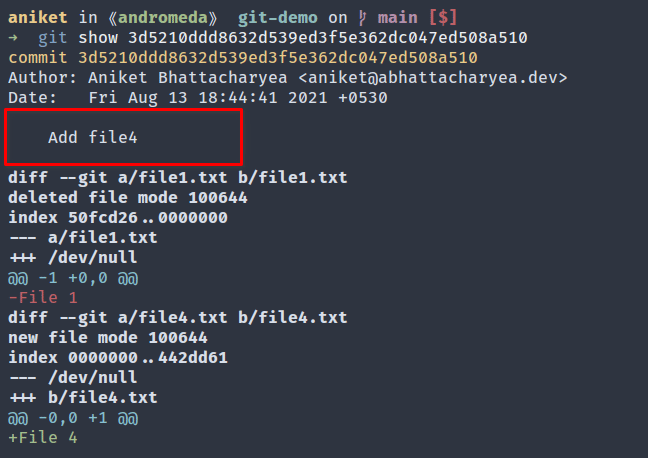
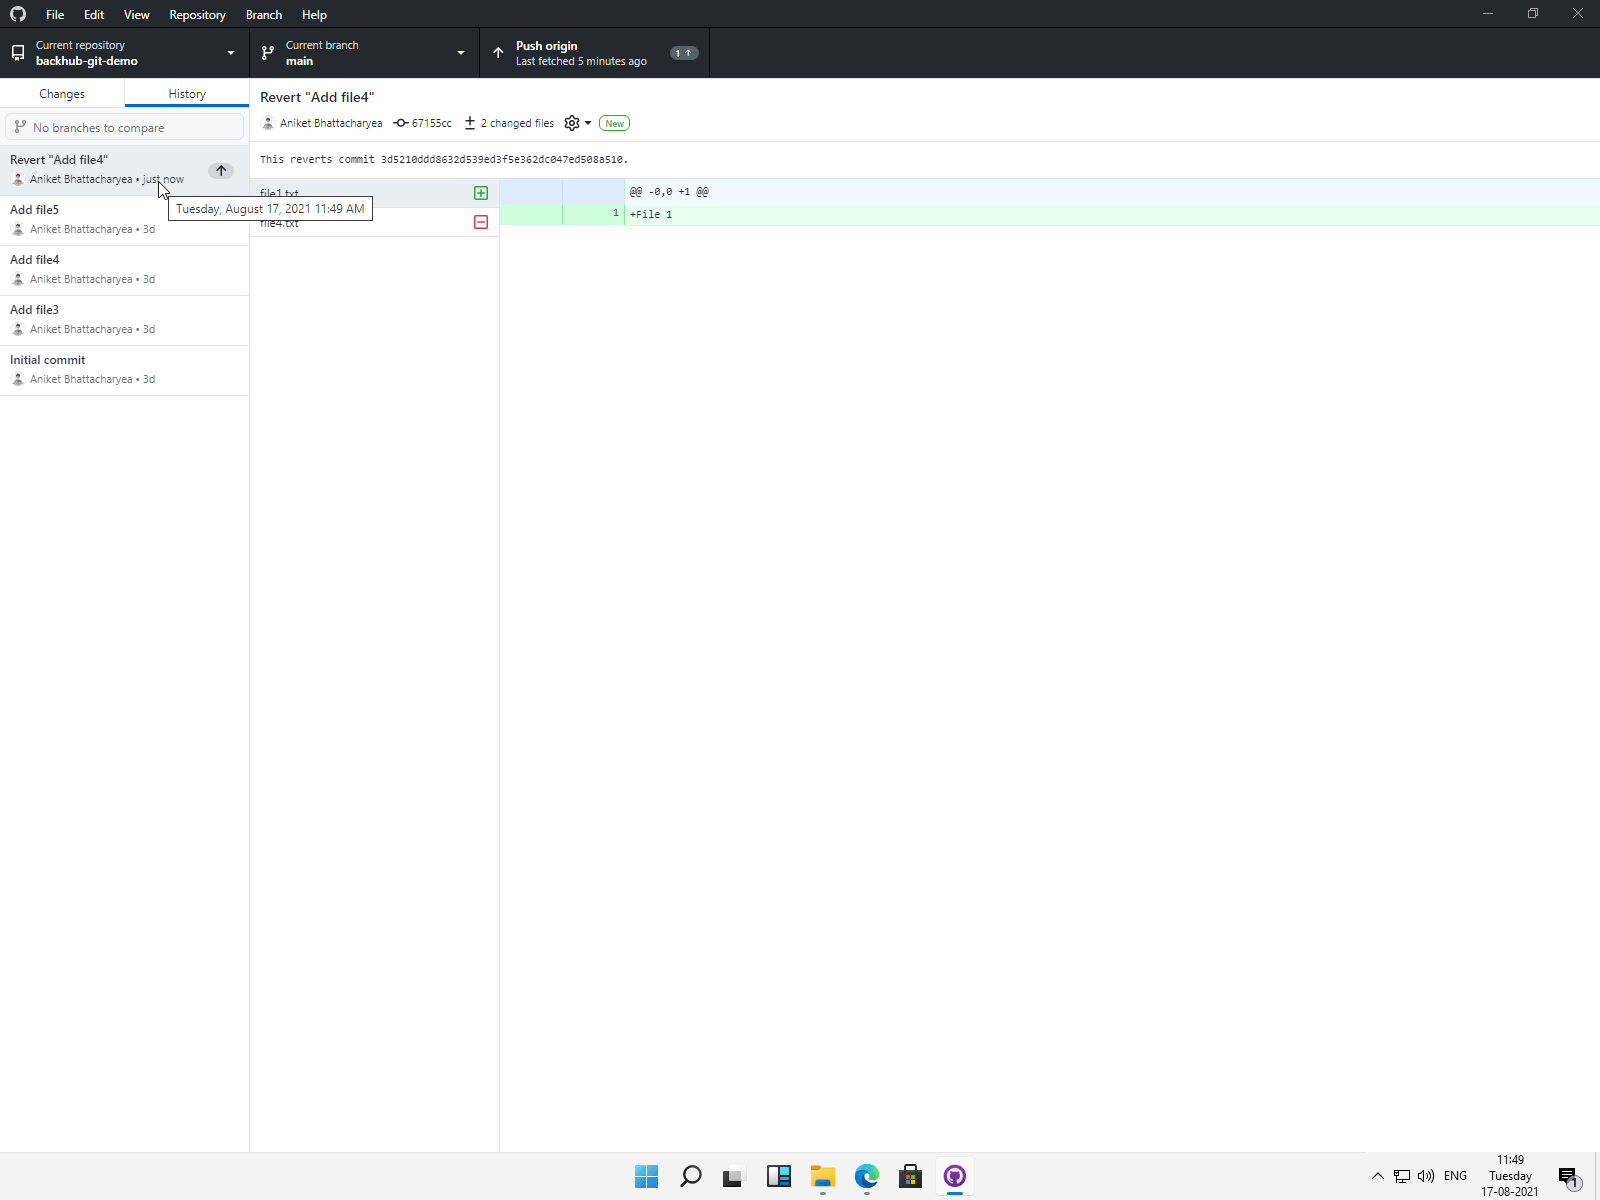
The name of the commit is “Add File4”. Then look for this confirmation on the App History tab.
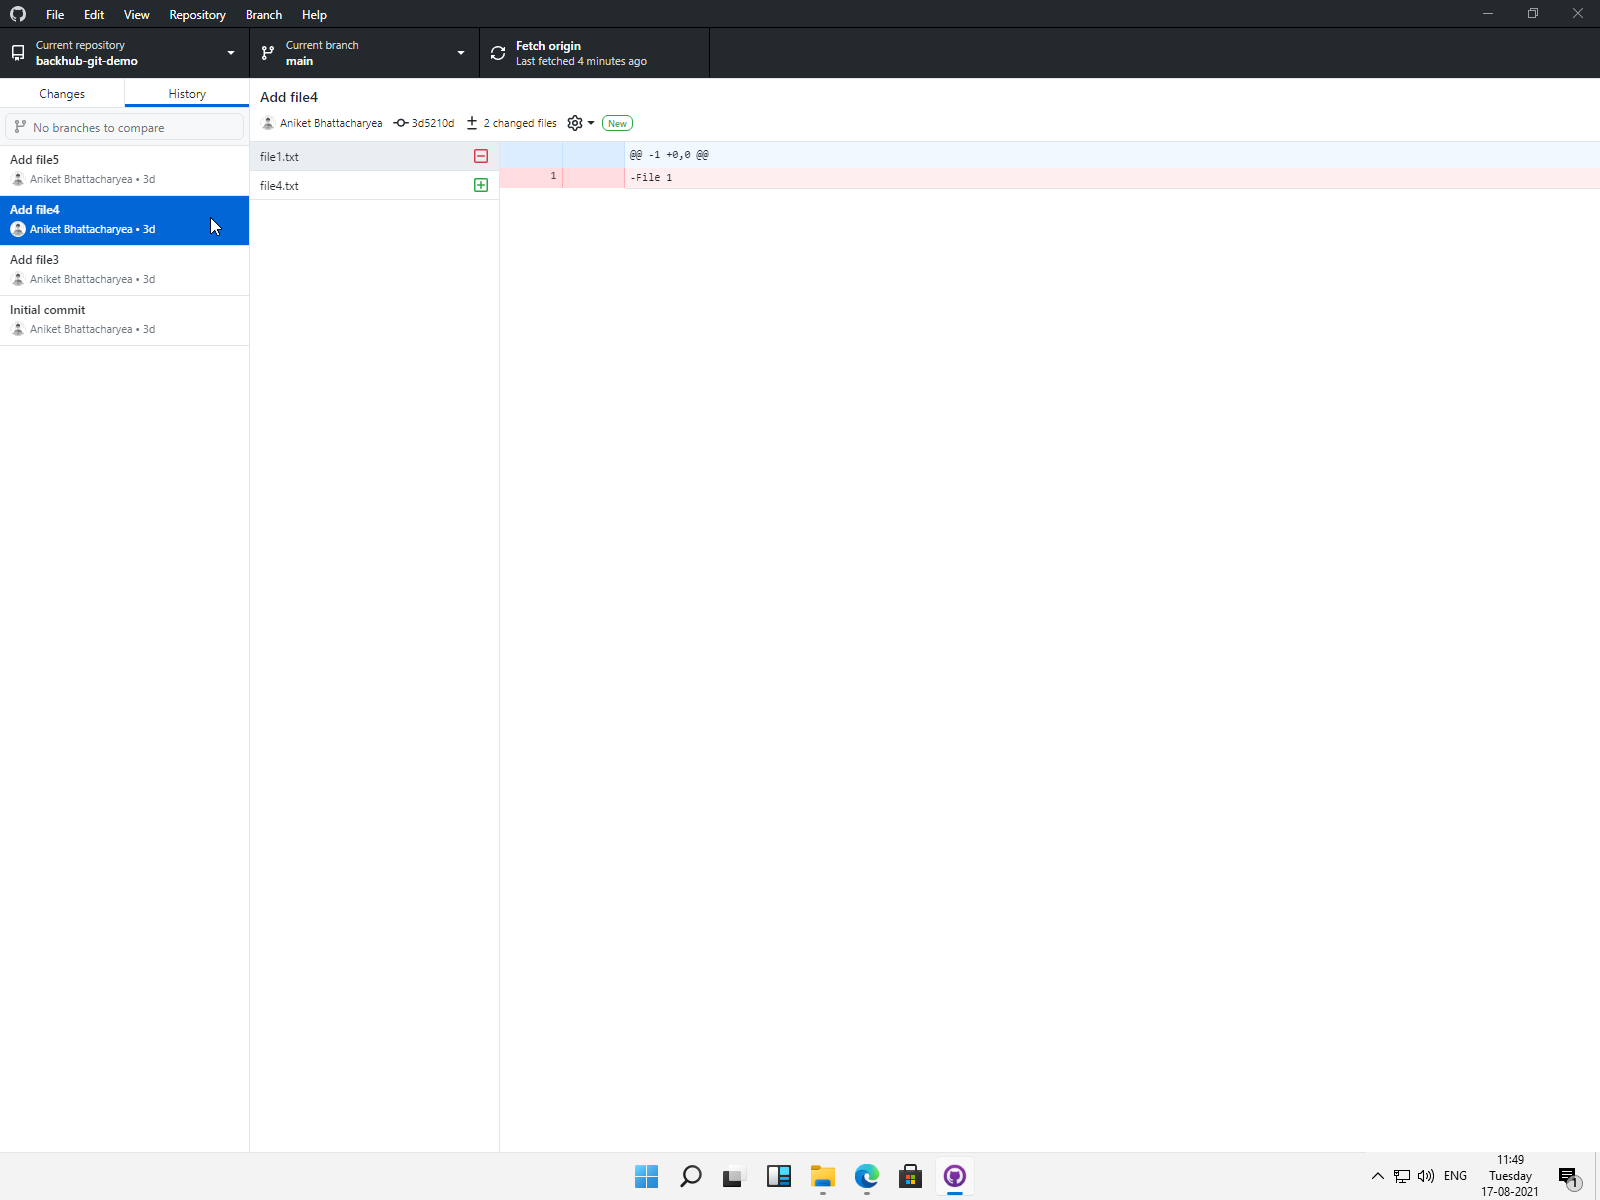
Right-click on the confirmation and select Revert changes to the confirmation.
src=”https://rewind.com/wp-content/uploads/2021/09/mDVo9ca.png?width=1600&name=mDVo9ca.png” alt=”Screenshot showing rollback changes menu” />
This will reverse the offending commit and create a new confirmation.
Pros and Cons of Using the GitHub Desktop App
This method is comparatively easier than using the command line and a better option if you’re comfortable with graphical interfaces. However, it has the following disadvantages:
- The desktop app is only available for Windows and macOS. If you are using Linux, you will not be able to use this method.
- If you have already confirmed the deletion, this method becomes cumbersome as you need to use the command line to find the confirmation name and then search the application history to locate the confirmation.
- It is not possible to extract only the required confirmation file using this method. You must revert the entire commit, which means that any other changes made by the commit will also be rolled back.
Using the GitHub web UI If you have confirmed the deletion and submitted it to GitHub, it is possible to recover a deleted file using the GitHub
web UI
. GitHub allows you to browse commit history and explore the project at any point in the history, allowing you to view and download any file.
Let’s recover the ‘file1.txt’ already deleted in the repository. Similar to the previous approach, you need to know which commit deleted the file, using the ‘git rev-list’ command explained above. In our case, the commit hash is ‘3d5210ddd8632d539ed3f5e362dc047ed508a510’.
Open a browser and visit the URL – ‘https://github.com/<username>/<repo-name>/commits/3d5210ddd8632d539ed3f5e362dc047ed508a510^’. Be sure to replace ‘<username>’ and ‘<repo-name>’ to point to your repository. This will open the confirmation before the offending confirmation.
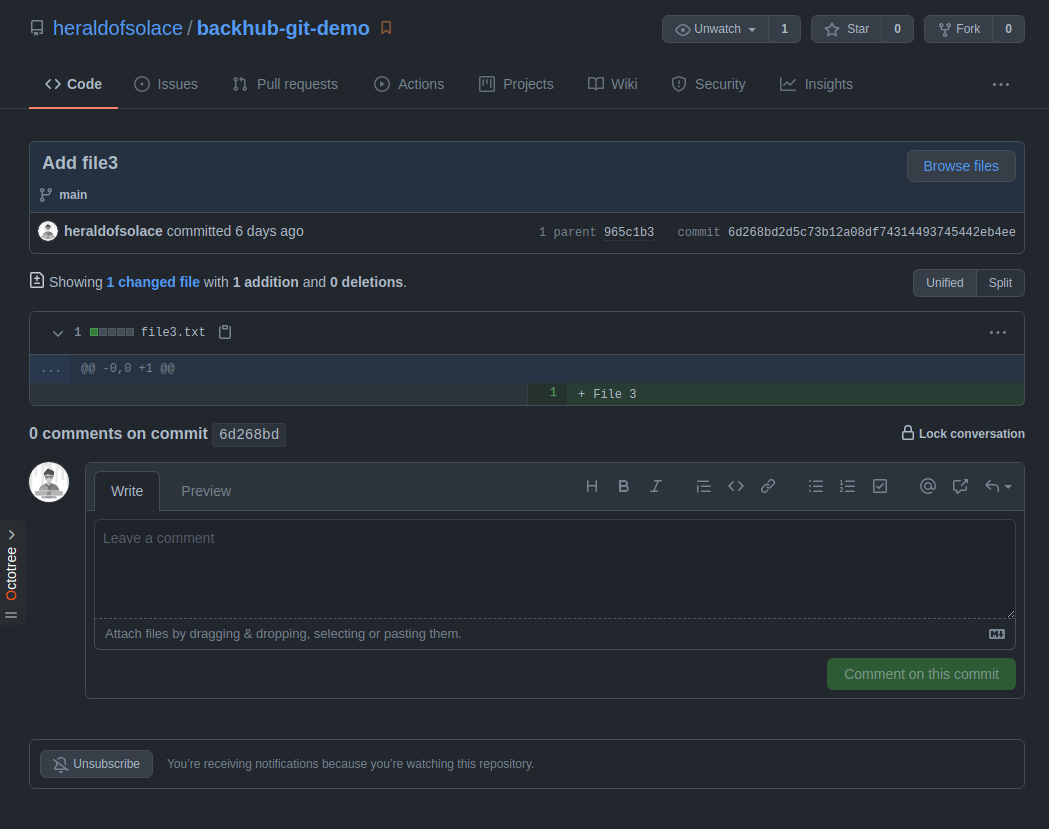
Click Browse Files and you will be presented with the project structure of that particular commit.
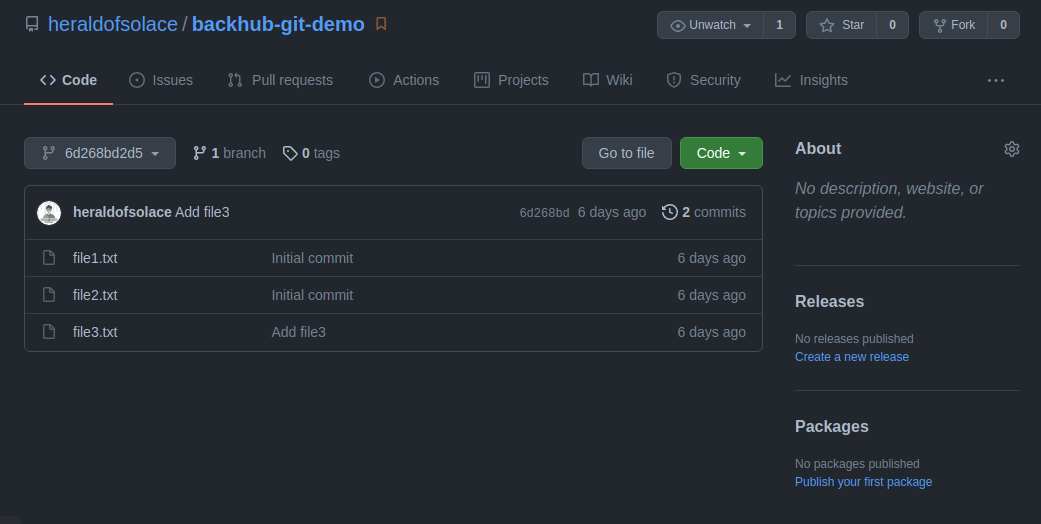
Locate the file you want to restore. In this case ‘file1.txt’. Open it by clicking on it.
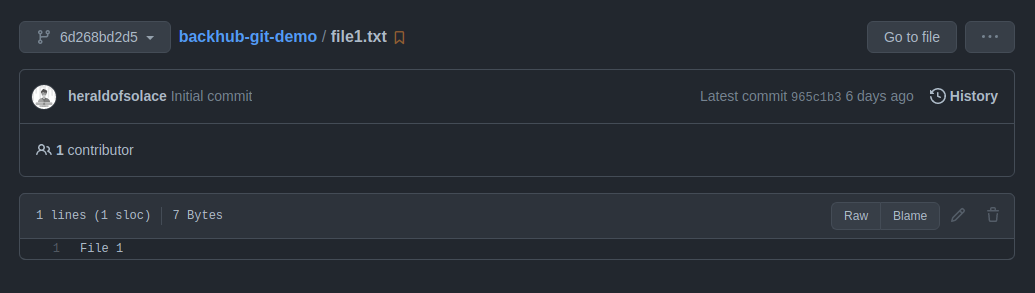
Click the Raw button and you will be presented with a raw text version of the file. You can right-click the page and select Save As to download the file and save it to the project. Now you can add it back to your local repository and confirm –
Pros and cons of using GitHub’s web UI
Similar to using the app, this method is easier to use than the CLI method because of its graphical interface. You can also visually navigate the repository at any point in your commit history without having to clone or uncheck the commit.
The biggest disadvantage of this approach, however, is that there is no way to select and download more than one file. So if you have accidentally deleted more than one file, you need to download them one by one, a time-consuming task. Also, this method relies a bit on the command line, as you need the command line to find out the confirmation hash.
Recovering
a
deleted file with Git is a comparatively complex process. Not only do you have to dabble with the command line to try to figure out the confirmation hashes, but you also need to make sure that the commit you’re restoring the file from is the correct one. If you have accidentally deleted more than one file, restoring them from different commits can introduce inconsistencies into your project. Using a complete backup solution like BackHub can save you some trouble when backing up the entire repository, ensuring consistent state.
BackHub
offers powerful features like nightly snapshots, Amazon S3 sync, repository metadata backup (issues, pull requests, wiki, etc.), and the ability to clone any snapshot directly from the BackHub server. Using your full backup solution will ensure that you don’t have to fiddle with Git when you accidentally delete one or more files. Instead, you can restore from an overnight backup. Even better, you can restore a deleted repository with just a few clicks if you accidentally delete one.
Let’s learn the process of installing BackHub and restoring files from the backup.
Installing
BackHub BackHub’s plans start from $12 per month. You can sign up for a free trial from the installation page. After signing up, you’ll be taken to an installation screen that configures permissions with your GitHub account. Here you can select which repositories you want to back up with BackHub. You can choose All Repositories to back up all your projects or individually select as many as you want. If you choose All Repositories, any new repositories you create on GitHub will be automatically backed up.
From there, you need to log in to GitHub and authorize BackHub to finish the installation. Once you return to your BackHub dashboard, you should see a list of supported repositories.
From this point on, BackHub will maintain nightly backups of the repositories. Snapshots are stored for thirty days, but up to 1 year (365 days) of storage is available for enterprise plans. You can also connect an S3 bucket in the configuration if you want to keep snapshots indefinitely.
Restoring a full backup
Let’s go over the steps to restore a deleted file using
BackHub.
First, let’s delete a file and submit
.
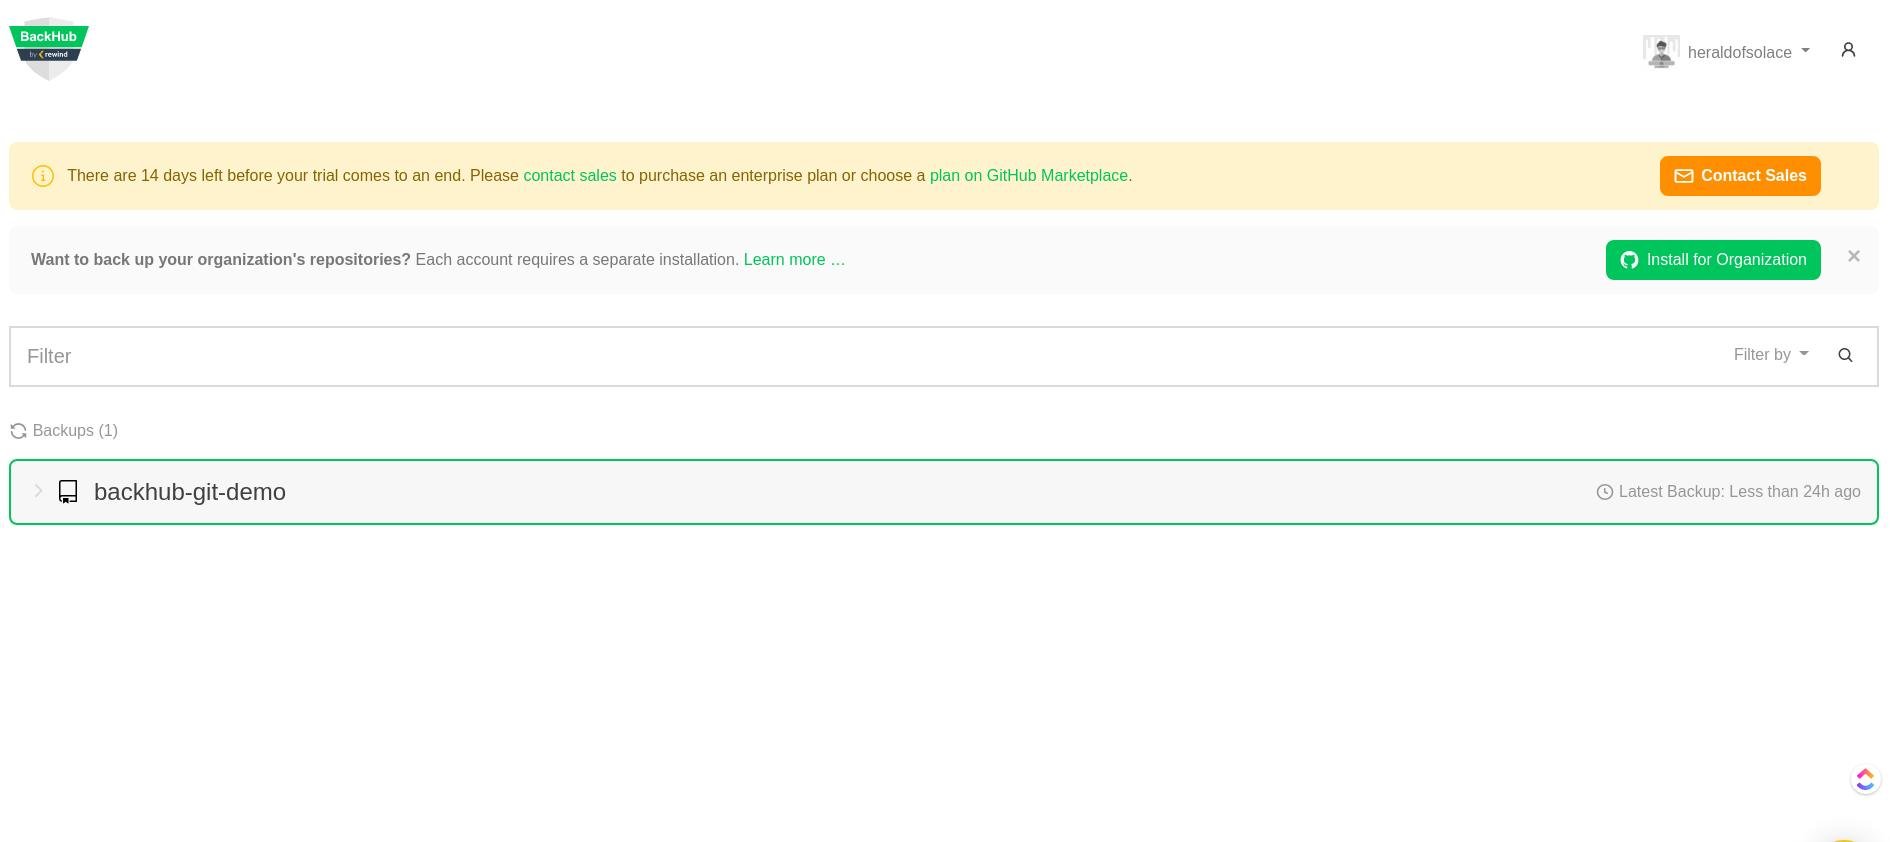
In the BackHub dashboard, select the repository you want to restore.

On the left side, you can see the time of the last backup and the number of snapshots that BackHub has created. If this is a recently added repository, you will only have a snapshot of the current version. If the repository was added some time ago, you will have daily snapshots and you can choose any day’s snapshot to restore.
Once the snapshot is chosen, click the Download Files button. The download will contain a ZIP with all the files in the header of the main branch. From there, you can easily copy the deleted file ‘file5.txt’ to your local repository and welcome it with a commit:
Conclusion
Accidentally deleting important files is every developer’s nightmare. As Git doesn’t have an intuitive undo command, it can be difficult to efficiently restore a deleted file.
However, with a complete backup solution ready, you can rest assured that you can combat any issues that may occur due to deleted files. You will also be able to restore deleted files smoothly. Having a complete backup solution can prove useful in the long run, especially in business-critical software or team-based environments.
See for yourself: Start your free trial of BackHub (now part of Rewind) for one of the best complete backup and restore solutions.