
This quick tutorial shows how to install VMware Workstation Player on Ubuntu
Linux.
VMware is one of the best desktop and server virtualization applications on Linux. Some people prefer it more than Oracle’s open-source VirtualBox.
With a virtual machine application such as VMware, you can run another operating system within your current operating system.
For example, if you want to try another Linux distribution, you can install it on a USB stick and use it as a live USB or install it alongside your current operating system. Both are fine, but you have to log out of your current system and boot into another one just to try a new operating system.
In this scenario, you can install another operating system inside Ubuntu as a virtual machine. You will be able to use it without leaving your main operating system, i.e. Ubuntu.
In this tutorial, I will show you how to install VMware Workstation Player on Ubuntu 20.04, 22.04 and future versions. The instructions must also be valid for Linux Mint and other Ubuntu-based distributions.
Note: VMWare Workstation is not open source software.
Install VMware on Ubuntu 20.04 and 22.04<
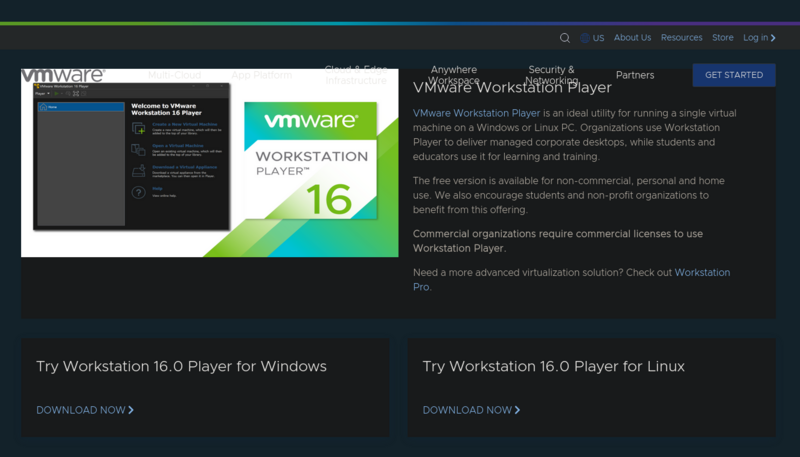
VMware Workstation Player is free for personal, non-commercial use. As an individual, you can use it without paying anything.
Recommended system requirements for installing VMware Workstation Player:For
a decent VMware experience, your system must meet the following criteria:
- 64-bit 2 GHz processor
- Minimum 4 GB RAM (8 GB recommended)
- Disk space depends on the guest operating system you are installing on the virtual machine
To
install VMware Workstation Player
on Ubuntu and other Ubuntu-based distributions, follow the steps below
😛 aso 1: Install the required build packages
Open a terminal (Ctrl+Alt+T) and use the following command to install the required build packages and Linux kernel headers from the
build-essential package:sudo apt install build-essential
Step 2: Download
VMware Workstation Player
The next step is to download VMware Workstation Player from their website.
You will see options to download VMware Workstation Player for Windows and Linux. There are no prizes for guessing that you have to download the Linux version here.
Don’t worry when you start downloading a . Bundle. That’s really the installer.
=”https://itsfoss.com/content/images/size/w600/wordpress/2022/07/Download-VMware-Workstation-Player.png” alt=”right-click on the downloaded installation file” />
Step 3: Install VMware Player
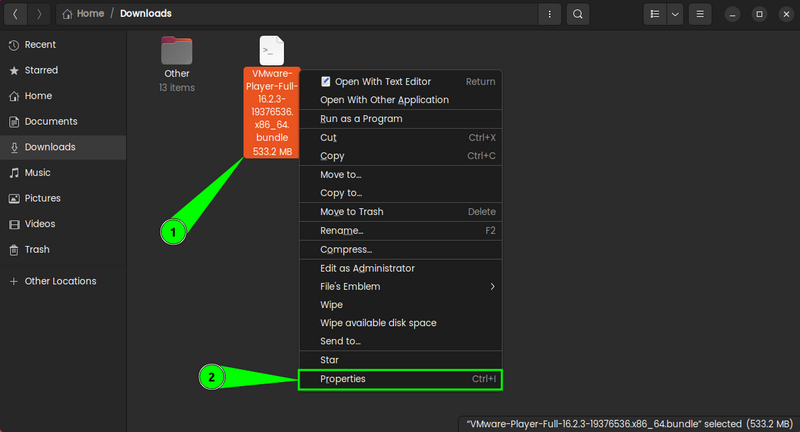
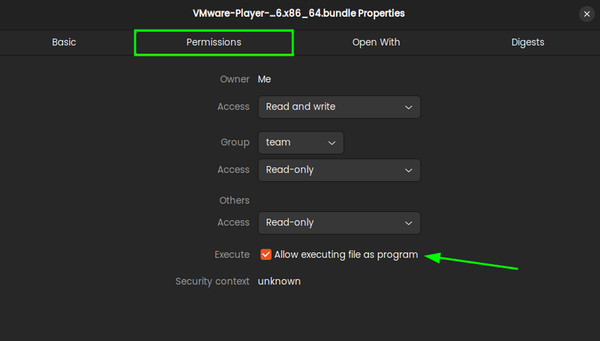
You
must set the execute permission on the downloaded installation file
.
You can do it graphically without the terminal. Just go to the folder where the file was downloaded. Right click on
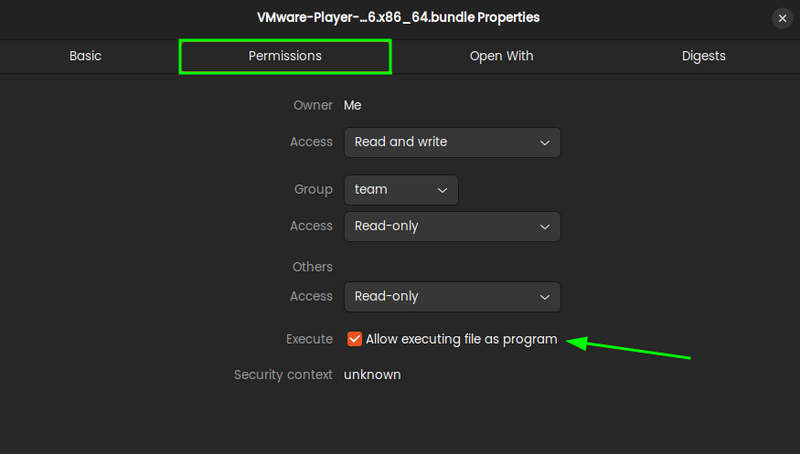
it and make it executable as shown in the image below: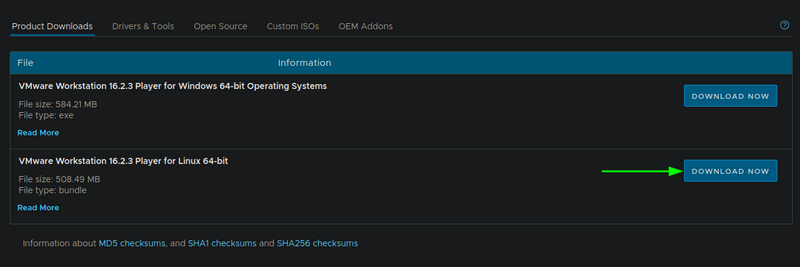 Head to the
permissions tab and proceed to allow the file to run as a program.
=”
Subsequently, right-click on the file now and you should see the “Run It” option. Continue with it and the installation should begin.
Alternatively, you can try the command line:
I assume it has been downloaded to your download directory. If so, use the following command to make the file executable
:chmod +x ~/Downloads/VMware-Player*
And then run the installation file
:sudo ~/Downloads/VMware-Player*
This will open an installation window.
Troubleshooting tip: Installation failed due to vmmon, vmnet
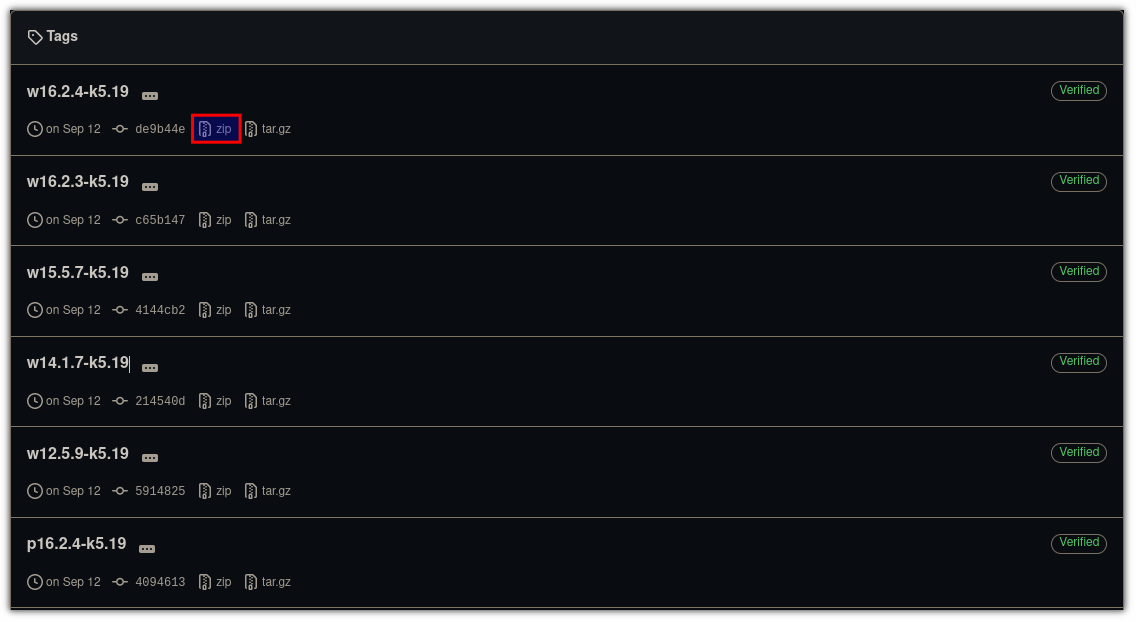
kernel module error On Ubuntu and other distributions that use newer kernels, VMware installation stops upon encountering a vmmon and vmnet kernel module error. To rectify this and continue with the installation
:
First, install the prerequisites for compiling and installing packages from source:
sudo apt install gcc build-essential
Go to https://github.com/mkubecek/vmware-host-modules/tags and choose your VMware Player version and download the zip
Next, you need to navigate to the extracted directory through the terminal (using the cd command) and use the commands given one by one to create
tar files of the modules: tar -cf vmmon.tar vmmon-only tar -cf vmnet.tar vmnet-only Now,
copy the newly created tar files
to /usr/lib/vmware.modules.source :sudo cp -v vmmon.tar vmnet.tar /usr/lib/vmware/modules/source/
And the last step is to use the given command, and install kernel modules on your system
: sudo vmware-modconfig -console -install-all
Step 4: Install VMware Player
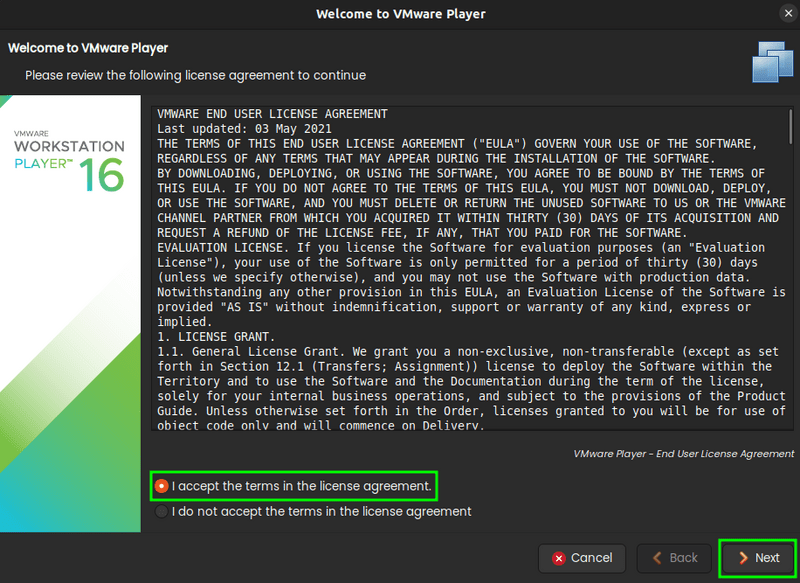
From here, it’s not rocket science. Like any other app, follow the on-screen instructions. Here are some of the screenshots for reference:

You must accept the terms and conditions to continue. And then enable/disable the ability to check for updates when you start VMware Workstation Player.
VMware then collects requests that you share some of your user data to improve the user experience. You can opt out if you wish.
 VMware
You may also be asked for a license key, don’t panic, you don’t need one if you want to use the free VMware player for non-commercial purposes. For commercial use, get the pro edition (where you’ll get a license key).
And that would
be it.
The installation should begin and you will be notified/greeted when it completes.
If you want to be able to copy and paste between the actual operating system (host) and the virtual operating system (guest) and share files between them, you must also install VMware Tools on Linux.
How to Uninstall VMWare Player from Ubuntu
If your workflow requires more than what VMWare player offers, or you just want to remove it from your system, here are quick steps to uninstall VMWare from Ubuntu
:
First, change your current directory
to /usr/bin:cd /usr/bin And use the given command to start the
uninstall
process
:
sudo vmware-installer -u vmware-player
Type yes and it will remove VMWare from your system:
Final Words
This was a quick guide on how you can install VMWare on Ubuntu-based distributions. I hope this solves your problem and if not, let me know in the comments and I will do my best to find a solution.
Prefer to use VMware Workstation Player? Share your thoughts in the comments below.